Update:
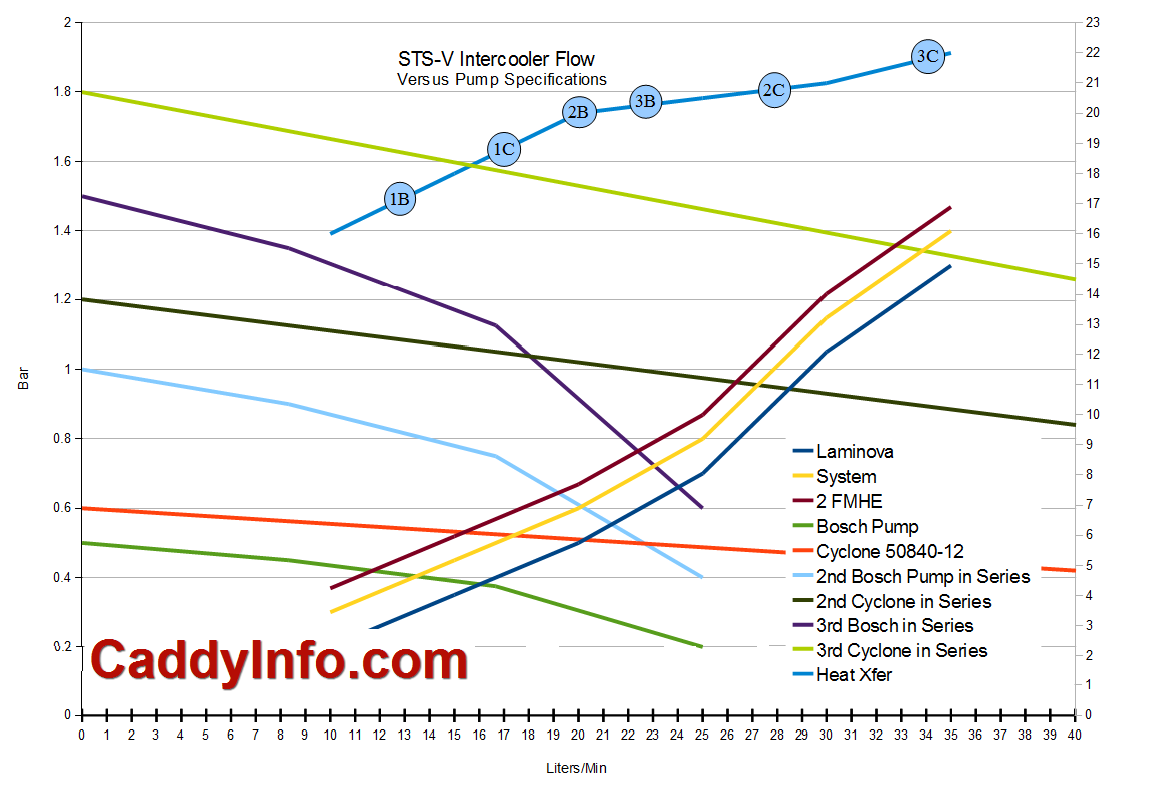
Although the info shown is relevant for 4 Laminova cores in series, the Cadillac design does not have 4 in series but rather has A-B in parallel and C-D in parallel flow. I caused some confusion in the way I asked my question of Laminova as it turns out. I am leaving this for consideration, but the pressure head through 2 Laminova cores instead of through 4 cores would be different.
In my analysis of pump flow rates versus the intercooler pressure head it became clear that at higher flow rates the stock pump has restricted flow. In fact, instead of flowing 8 gallons per minute (gpm) it is probably flowing under 4 gpm. We could find a new source for a intercooler coolant pump that can flow 9 gpm against a 1.4 bar resistance; that would be ideal. However, there is a way to work with the parts we have to overcome this hurdle.
Note that I don’t have a sophisticated model of the overall flow resistance, but that my conjecture is that the flow across the heat exchanger is around a 1 psi resistance, and that system resistance for the hoses etc is 0.4 psi. In my modeling a second front mounted heat exchanger is shown as another 1 psi of resistance.
The stock intercooler coolant pump is a centrifugal pump. When two or more centrifugal pumps are placed in series, the resulting pump performance is obtained by adding their heads at a constant flow rate. [Ref: Engineering Toolbox]

For our previous graphing this basically means if you put two pumps in series you ‘stack’ the two pumps’ flow versus pressure diagram on top of each other.
Using this insight, one way to overcome the pressure head presented by our intercooler system with the parts we know is to put 2 of the stock Bosch pumps in series in the flow. If that works well, how would 2 of the Jabsco Cyclone 50840-12 pumps work? Hmm, what if we put THREE Bosch pumps in series? What about the Cyclones?
Good questions. I wondered this also, so I continued with our previous graphs & calcs to do the analysis:
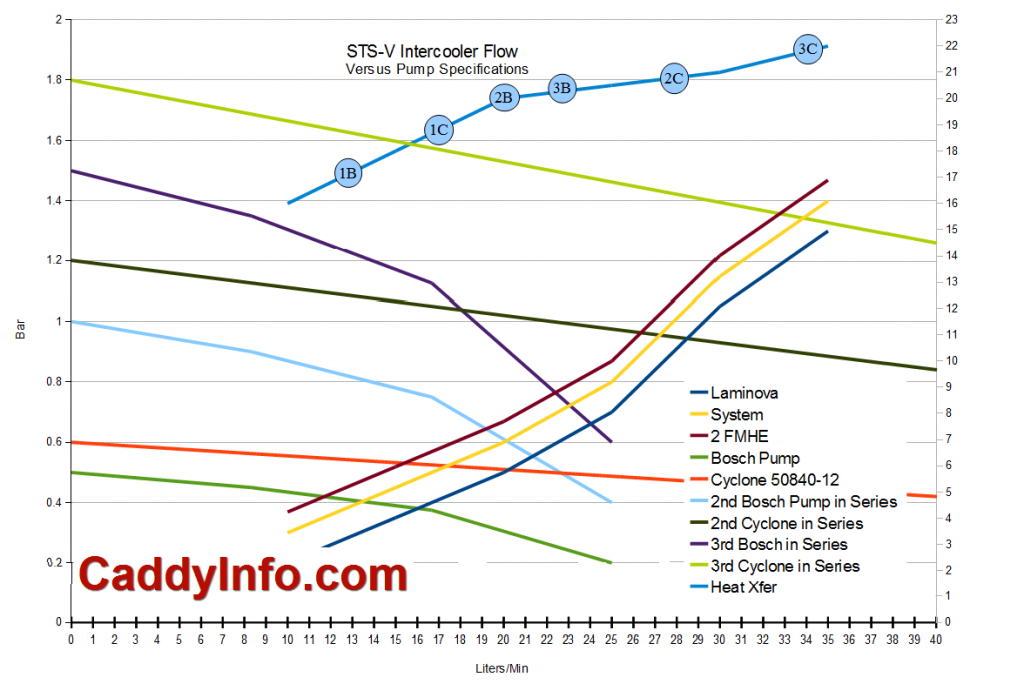
Multiple Intercooler Pumps in Series vs Intercooler Flow
Lots of complication, but let’s look at it. First, the light green line bottom left is the stock intercooler pump flow. Bottom left orange line is one cyclone pump.
See the light blue line that flows down from 1 bar and matches and doubles the green line flow line from one pump? That is the line for 2 stock intercooler pumps in series. The darker green line that runs down from 1.2 bar is for two Cyclone pumps in series.
What about 3 pumps? The purple line running down from 1.5 bar is 3 stock pumps in series. The yellow-green line running down from 1.8 bar is for 3 cyclone pumps in series.
What does all this mean? Here’s some tabular data:
|
Liters/Min |
|
Gallons/Min |
|
Heat Xfer |
|
| Pump |
Core Only |
System |
Core only |
System |
KW |
Delta |
| Bosch |
16 |
13 |
4.2 |
3.4 |
16.5 |
|
| Cyclone |
20 |
18 |
5.2 |
4.7 |
18.0 |
9.1% |
| Bosch x2S |
21 |
20 |
5.5 |
5.2 |
19.0 |
15.2% |
| Cyclone x2S |
29 |
27 |
7.6 |
7.1 |
20.5 |
24.2% |
| Bosch x3S |
24.5 |
23 |
6.4 |
6.0 |
20.0 |
21.2% |
| Cyclone x3S |
35 |
34 |
9.2 |
8.9 |
21.5 |
30.3% |
This tells us that the flow rate through the system with 1 stock pump of 3.4 gpm goes up to 5.2 gpm if you add another pump, or 6.0 gpm with 3.
The system flow rate of a Cyclone goes from 4.7 gpm alone to 7.1 gpm with 2 or 8.9 gpm with 3.
Is more flow always better? Well, yes, up to a point. On the flow diagram I have summarized the heat transfer for each combination with the circles with letters in them. 1B= one Bosch, 1C= one Cyclone, 2B= two Bosch, 2C=two Cyclone, 3B=3 Bosch, 3C= 3 Cyclone pumps in series on the line at the top of the flow diagram. That line they are all on is the heat transfer graph for the Laminova cores; it uses the right axis for its values, which are in kilowatts of heat transfer. In the table I have read off the approximate values from the graph.
What we see is that 2 Bosch (2B) pumps give us a 15% improvement in heat transfer, and 2 Cyclone pumps (2C) give a 24% improvement. Going to 3 pumps does improve it further but to a reduced degree. Adding 1 Bosch pump to the stock pump adds 15%; adding a 3rd only adds 6% more. Replacing the stock pump with 2 Cyclone pumps adds 24%; adding a 3rd Cyclone pump only adds 6% more.
Conclusion
My conclusion is that an optimal mix of expense versus reliability and complexity is to add a 2nd Bosch or replace the stock pump with 2 Cyclone pumps in series. That should give us the best bang for the buck improvement in flow and heat transfer relative to expense.
Issue
What is the safe pressure for the intercooler cooling system on the STS-V? What PSI is the relief/overflow cap set for? If it is set for 5 psi (0.3 bar) can the system function above that? Response: Because of the pressure drop across the Laminova cores at high flow rates there is a high pressure side of the system from the pump to the cores, and a low pressure side from the Laminova cores through the heat exchanger and the refill/pressure relief back to the pump. The 5 psi relief won’t trigger unless the pressure in the system at THAT point is above 5 psi.
Plans
I like the additional front mounted intercooler idea. It seems a good way to add system coolant capacity and some additional cooling. Additional coolant capacity acts as a delaying function for changes in coolant temperature. Each of the Jabsco Cyclone pumps runs around $210; so 2 for $420. The front-mounted heat exchanger (FMHE) for under the bumper I have in mind is $179. It would take 5 hours of labor or so to remove and replace the front clip to install ($400). So for a total budget of $1,200 or so the overall intercooler cooling system could be 24% more effective. If you do the work yourself parts alone would be $600.