Today I had a good opportunity to retest the DIY Spray Detailer.

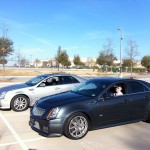
STS-V hood with offending debris
On the hood (bonnet) of my Cadillac STS-V I found a patch of bird debris that needed to be removed. Bird poop can be quite harmful to paint. The hood was also covered in a light dusting of, well, dust. I live in Plano, Texas which intended to be a prairie and not a suburb, so we get dust. The hood needed a good spritz rinse, bird poop removal, and clean-up.

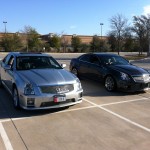
STS-V hood after DIY Spray Detailer spritz, microfiber cloth wipe
I adjusted the nozzle on the spray bottle to allow a good stream first, to rinse and break up the debris field. Then I adjusted to a spray pattern to fog the entire hood. Finally, I used a microfiber towel to wipe and dry the hood. Spray on, wipe off, easy, done.
My impression is most spray bottles have this sort of adjust-ability for pattern of spray, but the specific bottles I got were from Sam’s Club in the auto parts or industrial supplies area.
The results is a clean, good looking hood free of bird poop and ready for action.