Installing Sapele Wood inserts for the 2013 Cadillac ATS

After clearing back-order, the Sapele Wood inserts arrived for my Wife’s ATS.  She had an immediate negative reaction to the aluminum inserts the ATS arrived with, so I am glad Cadillac offers this type of customization.  I captured some pics while installing Sapele wood inserts for the Cadillac ATS.  Click on any of the pics to zoom in.

DSCF0288

DSCF0289

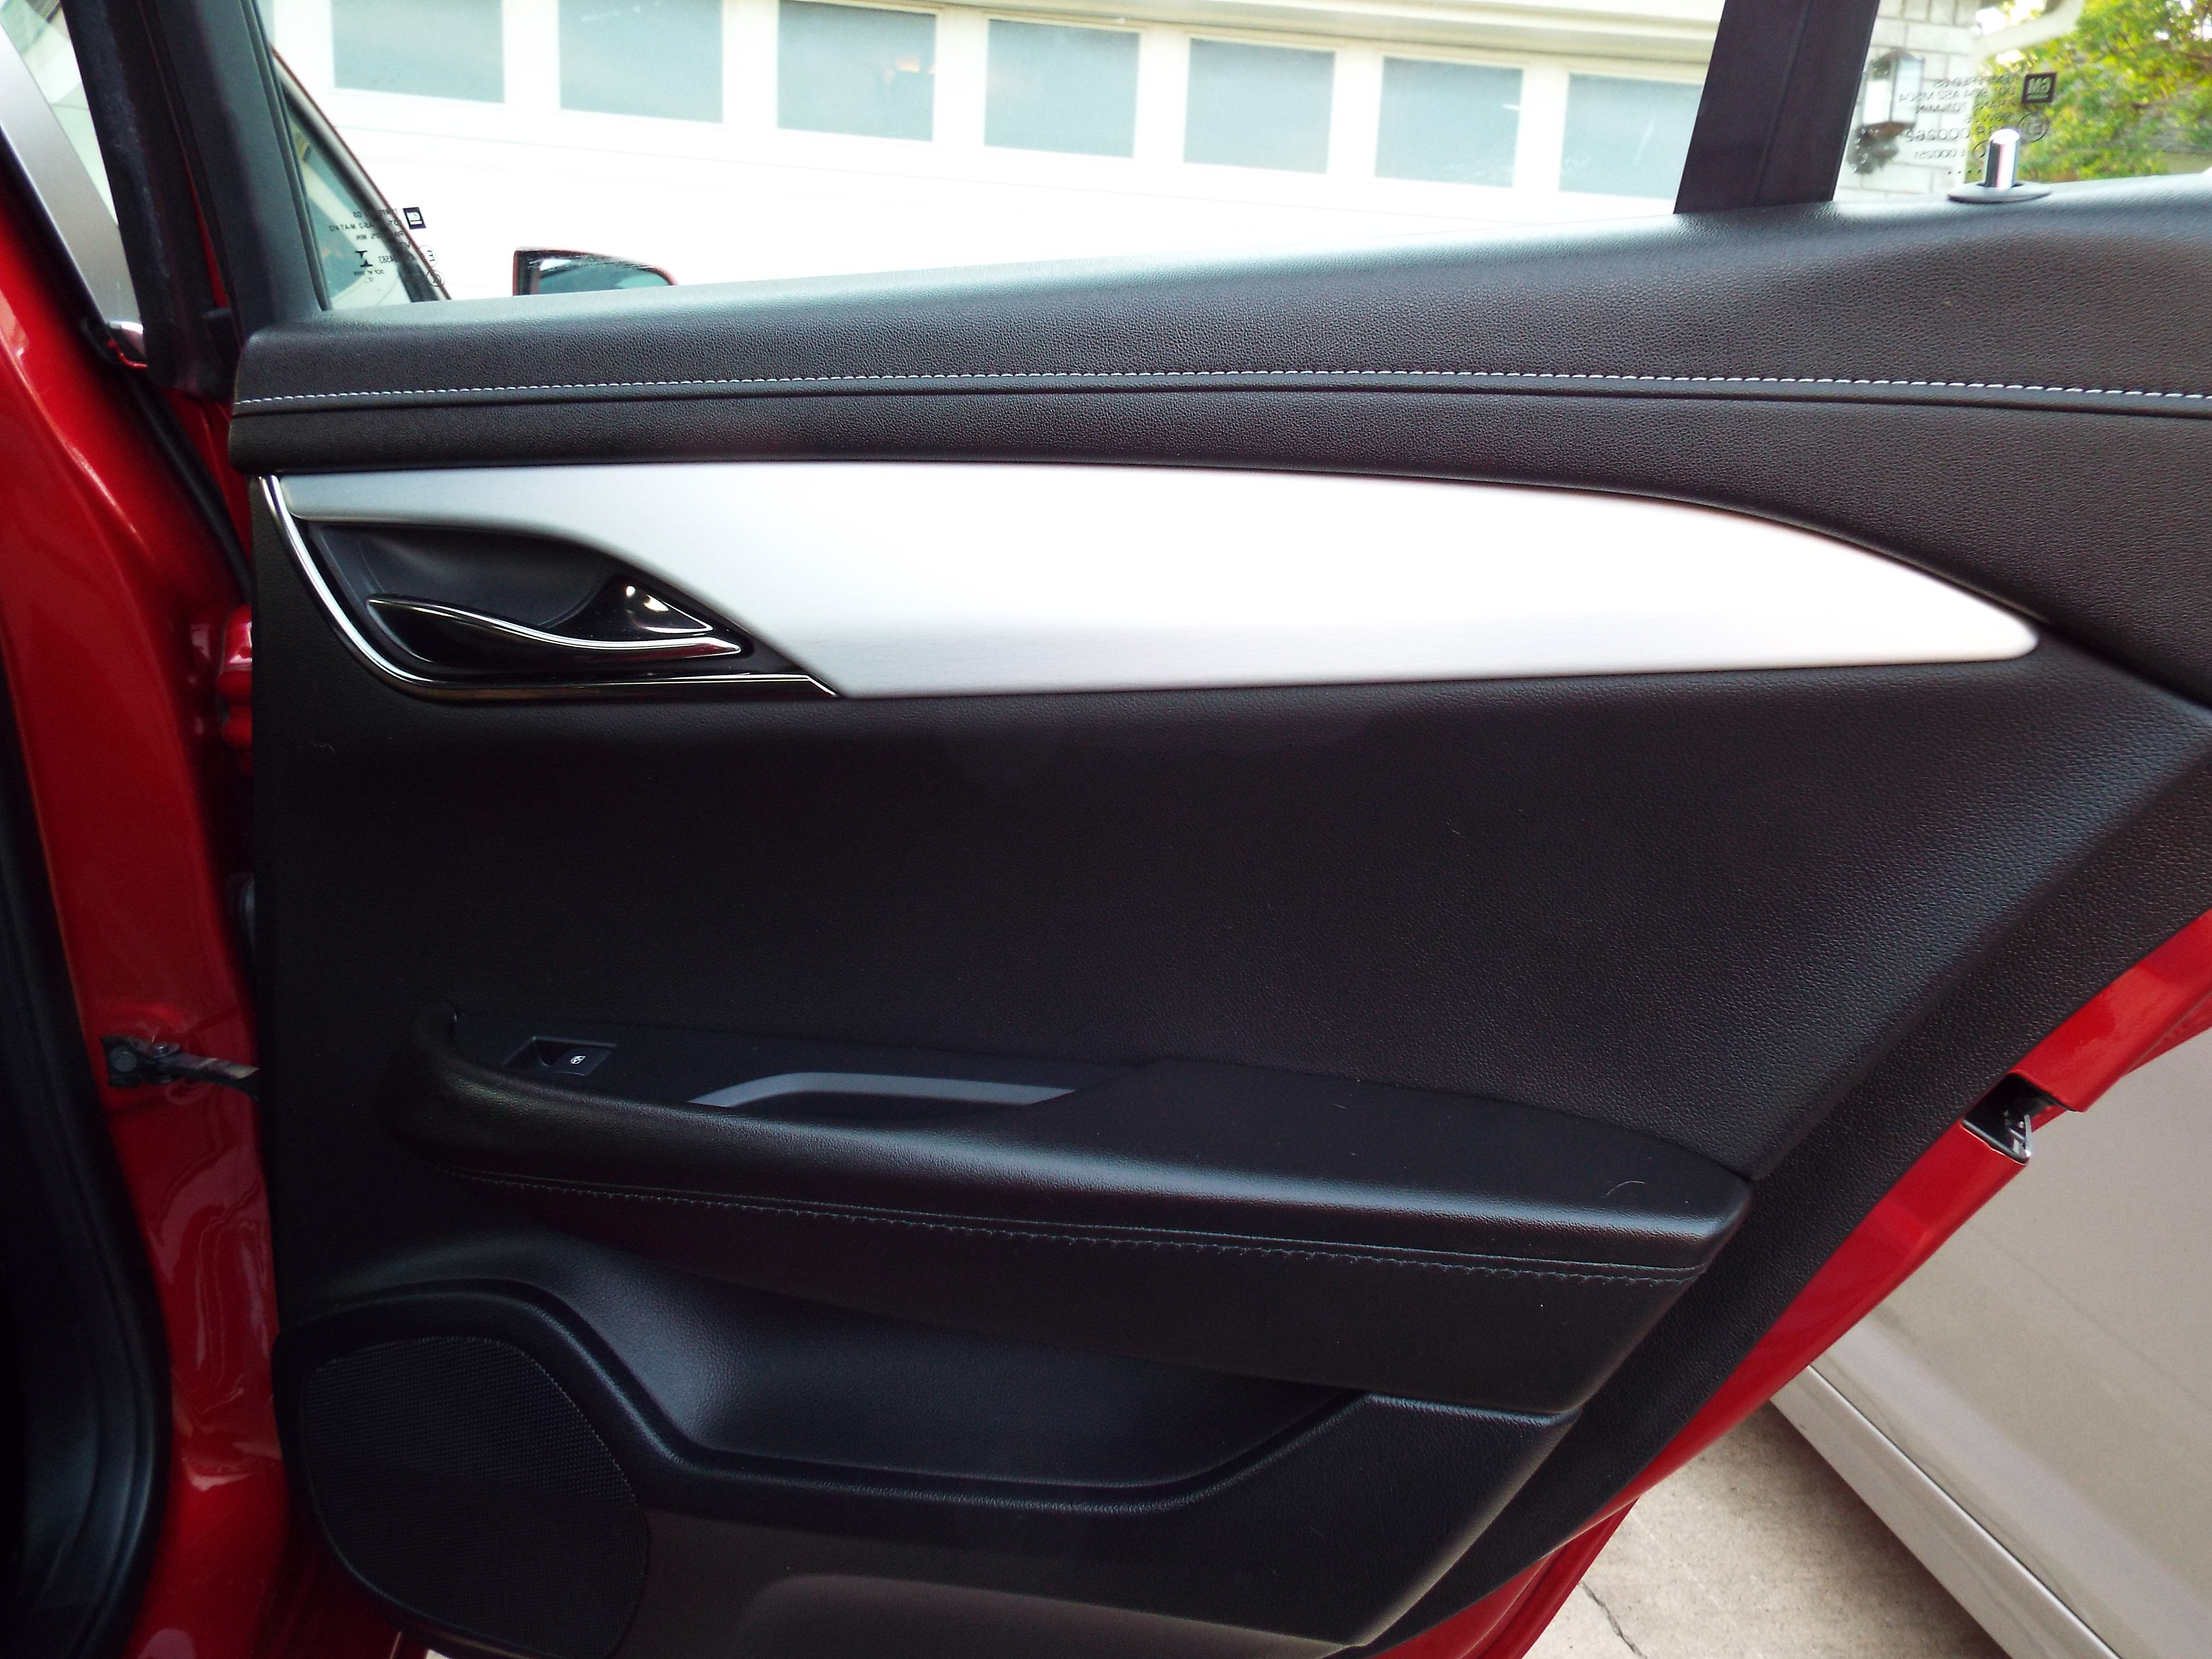
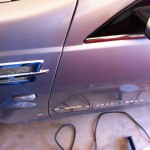
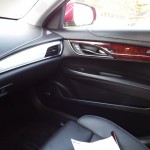
I started with the right rear door.  The shots above shows the brushed aluminum insert the ATS Premium arrived with.

DSCF0290 DSCF0291

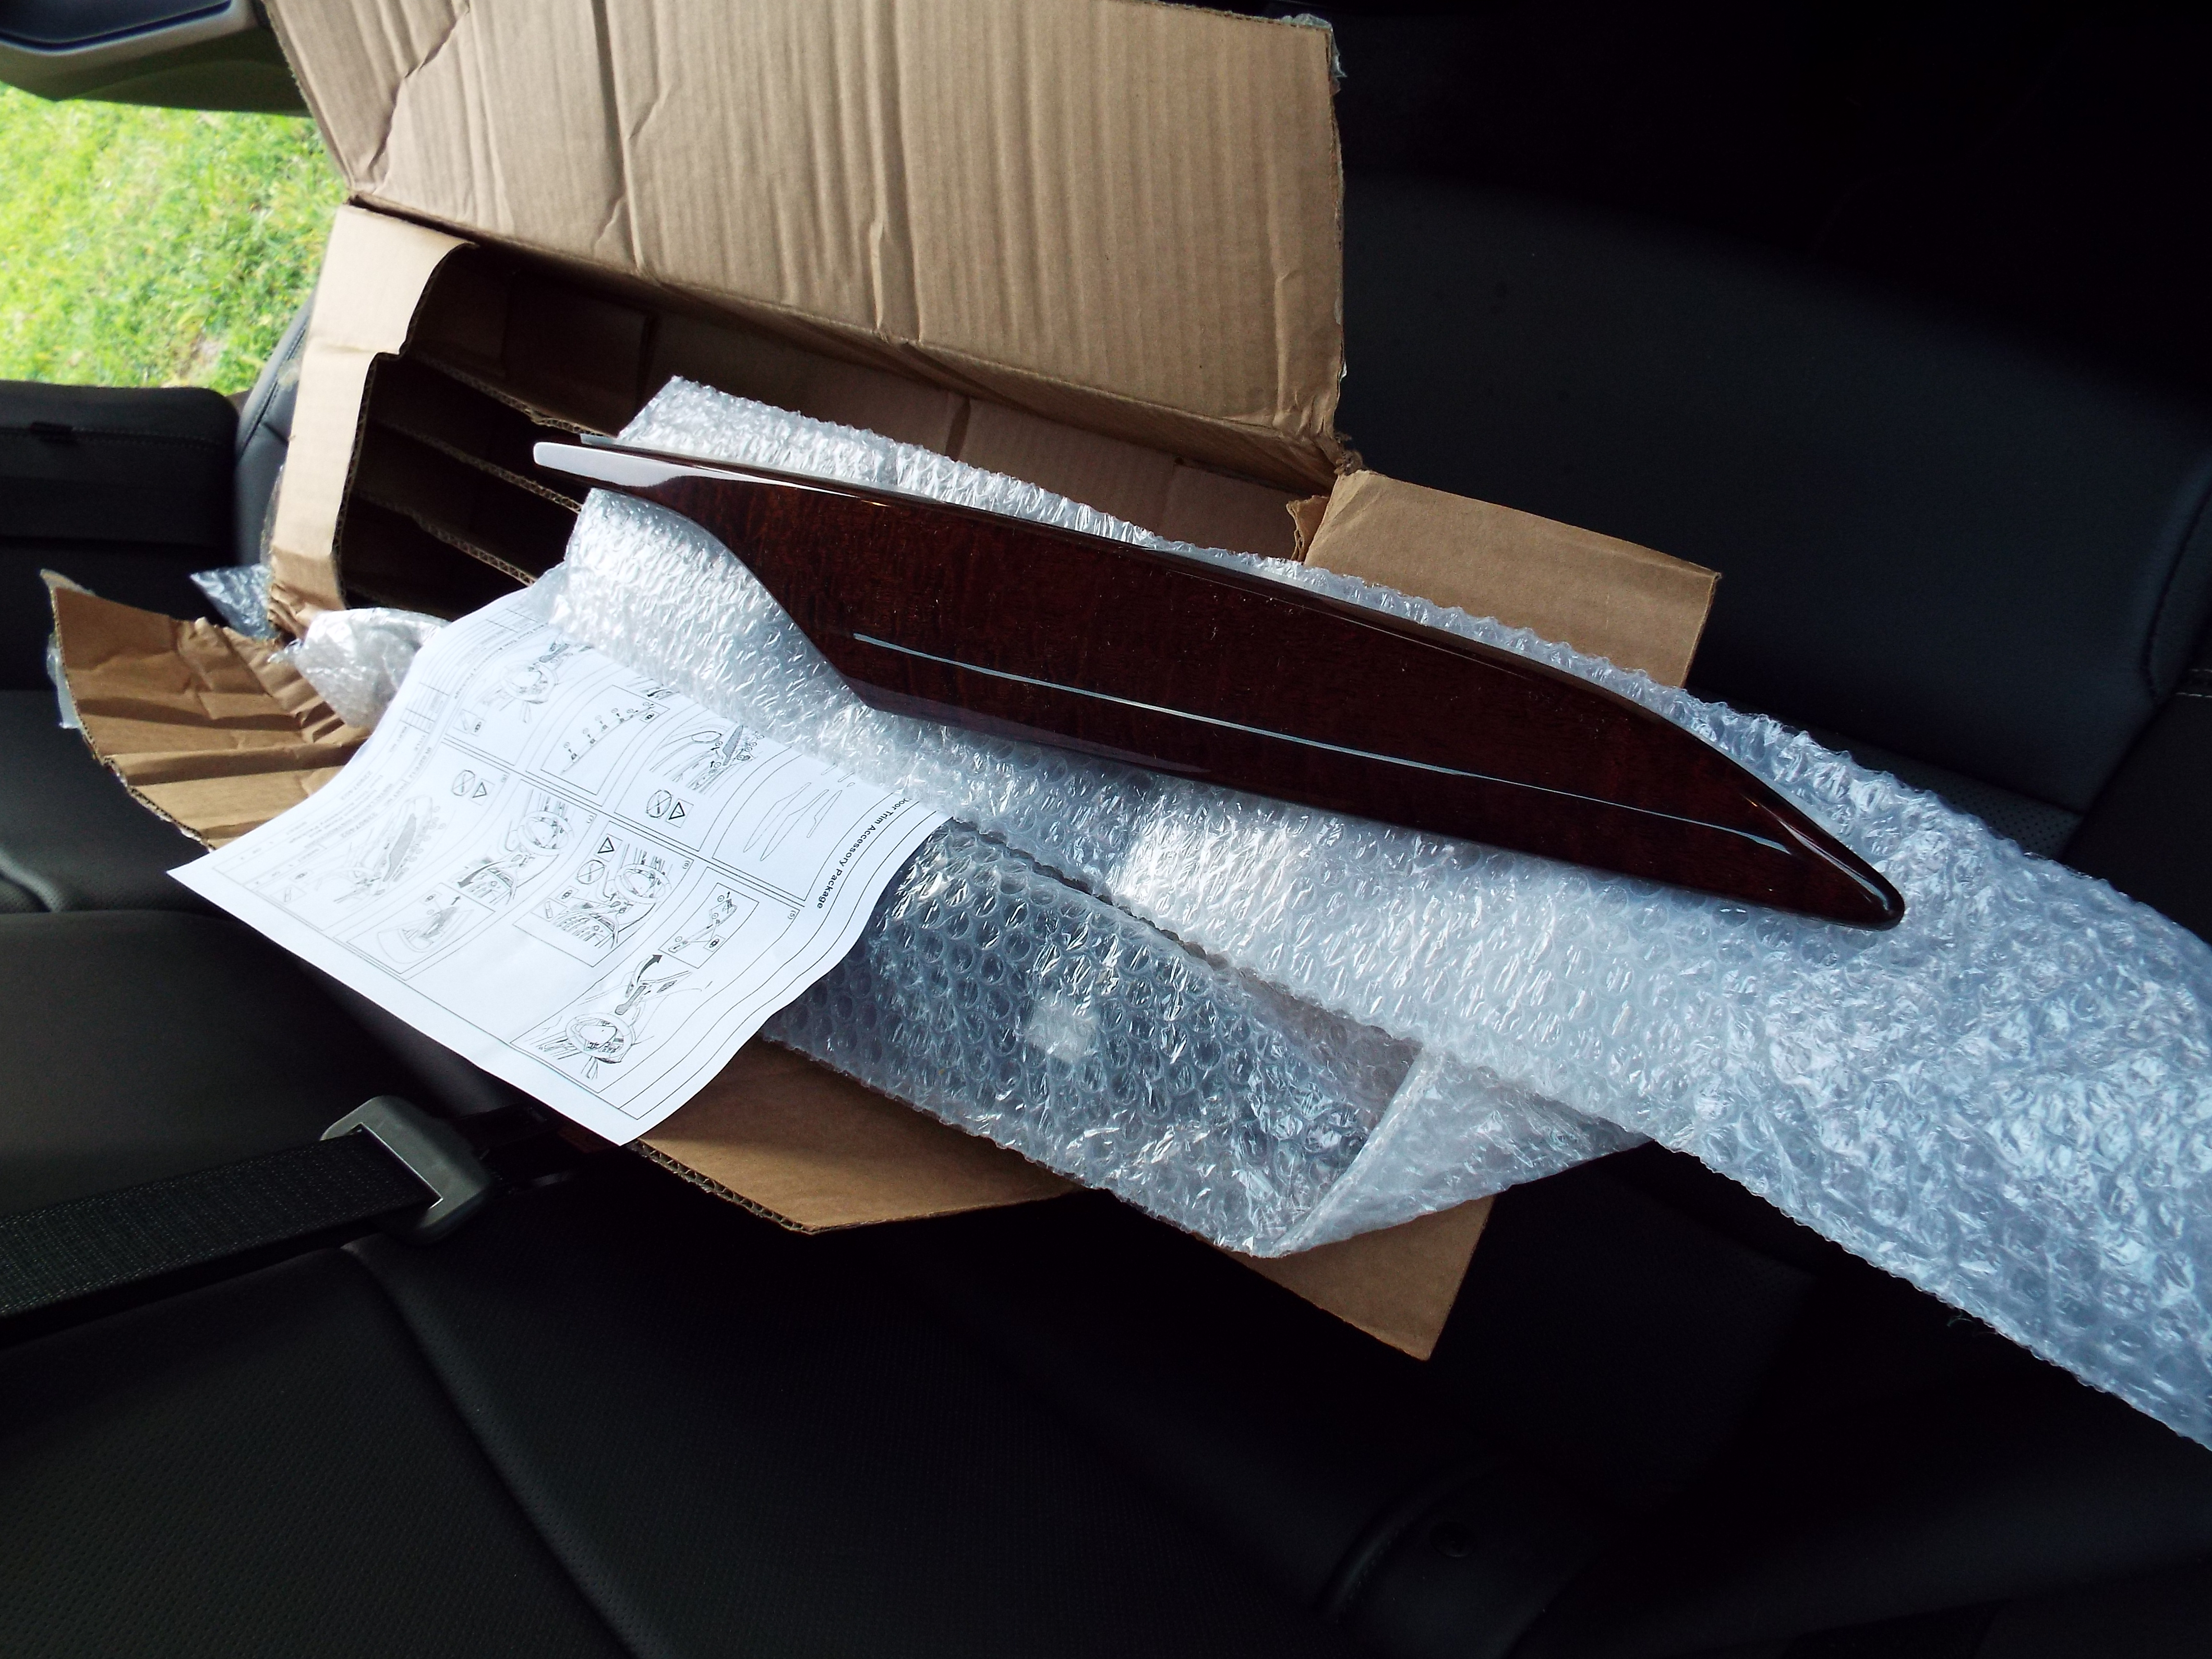
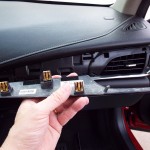
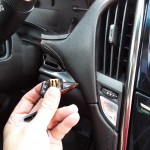
The inserts arrived nicely packaged in bubble wrap, and in a partitioned carton.  Each insert has the fingers and retainers molded in to they are ready to slide / snap into the Cadillac once the previous items are removed.

DSCF0293

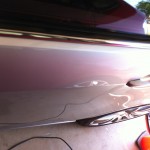
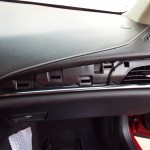
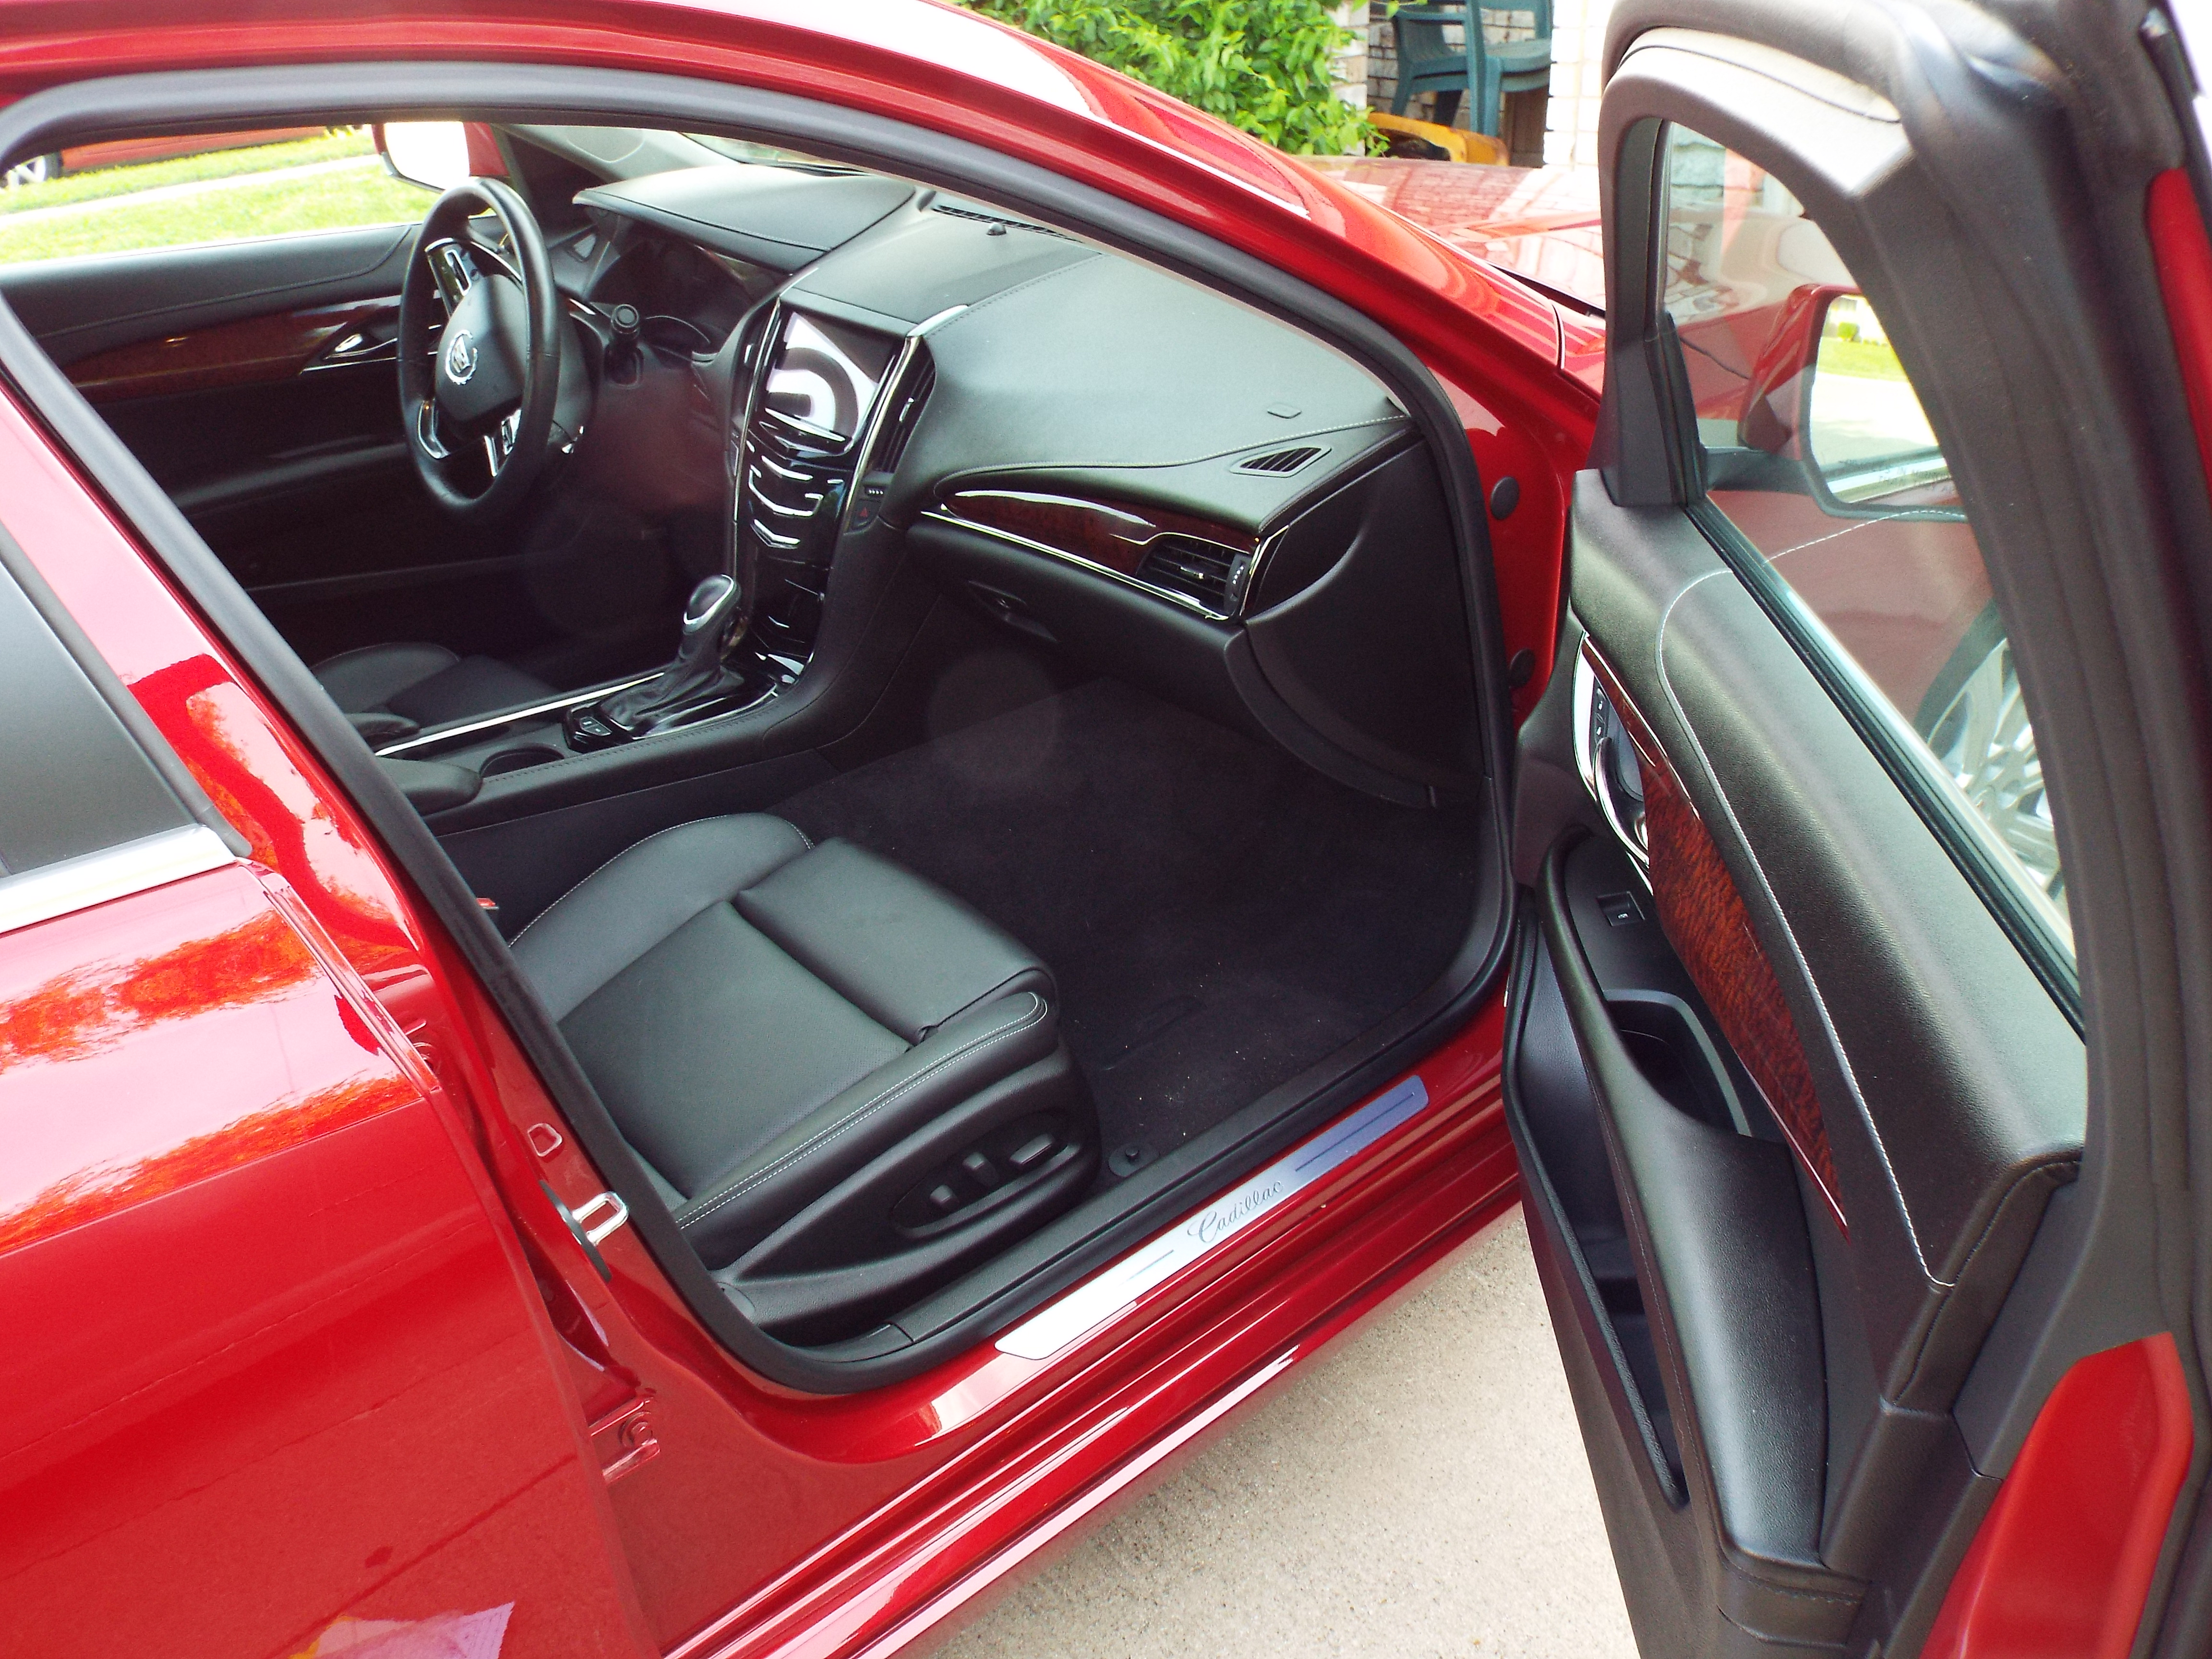
This shot shows ‘behind the scenes, the inner panel ready for the insert.

DSCF0296

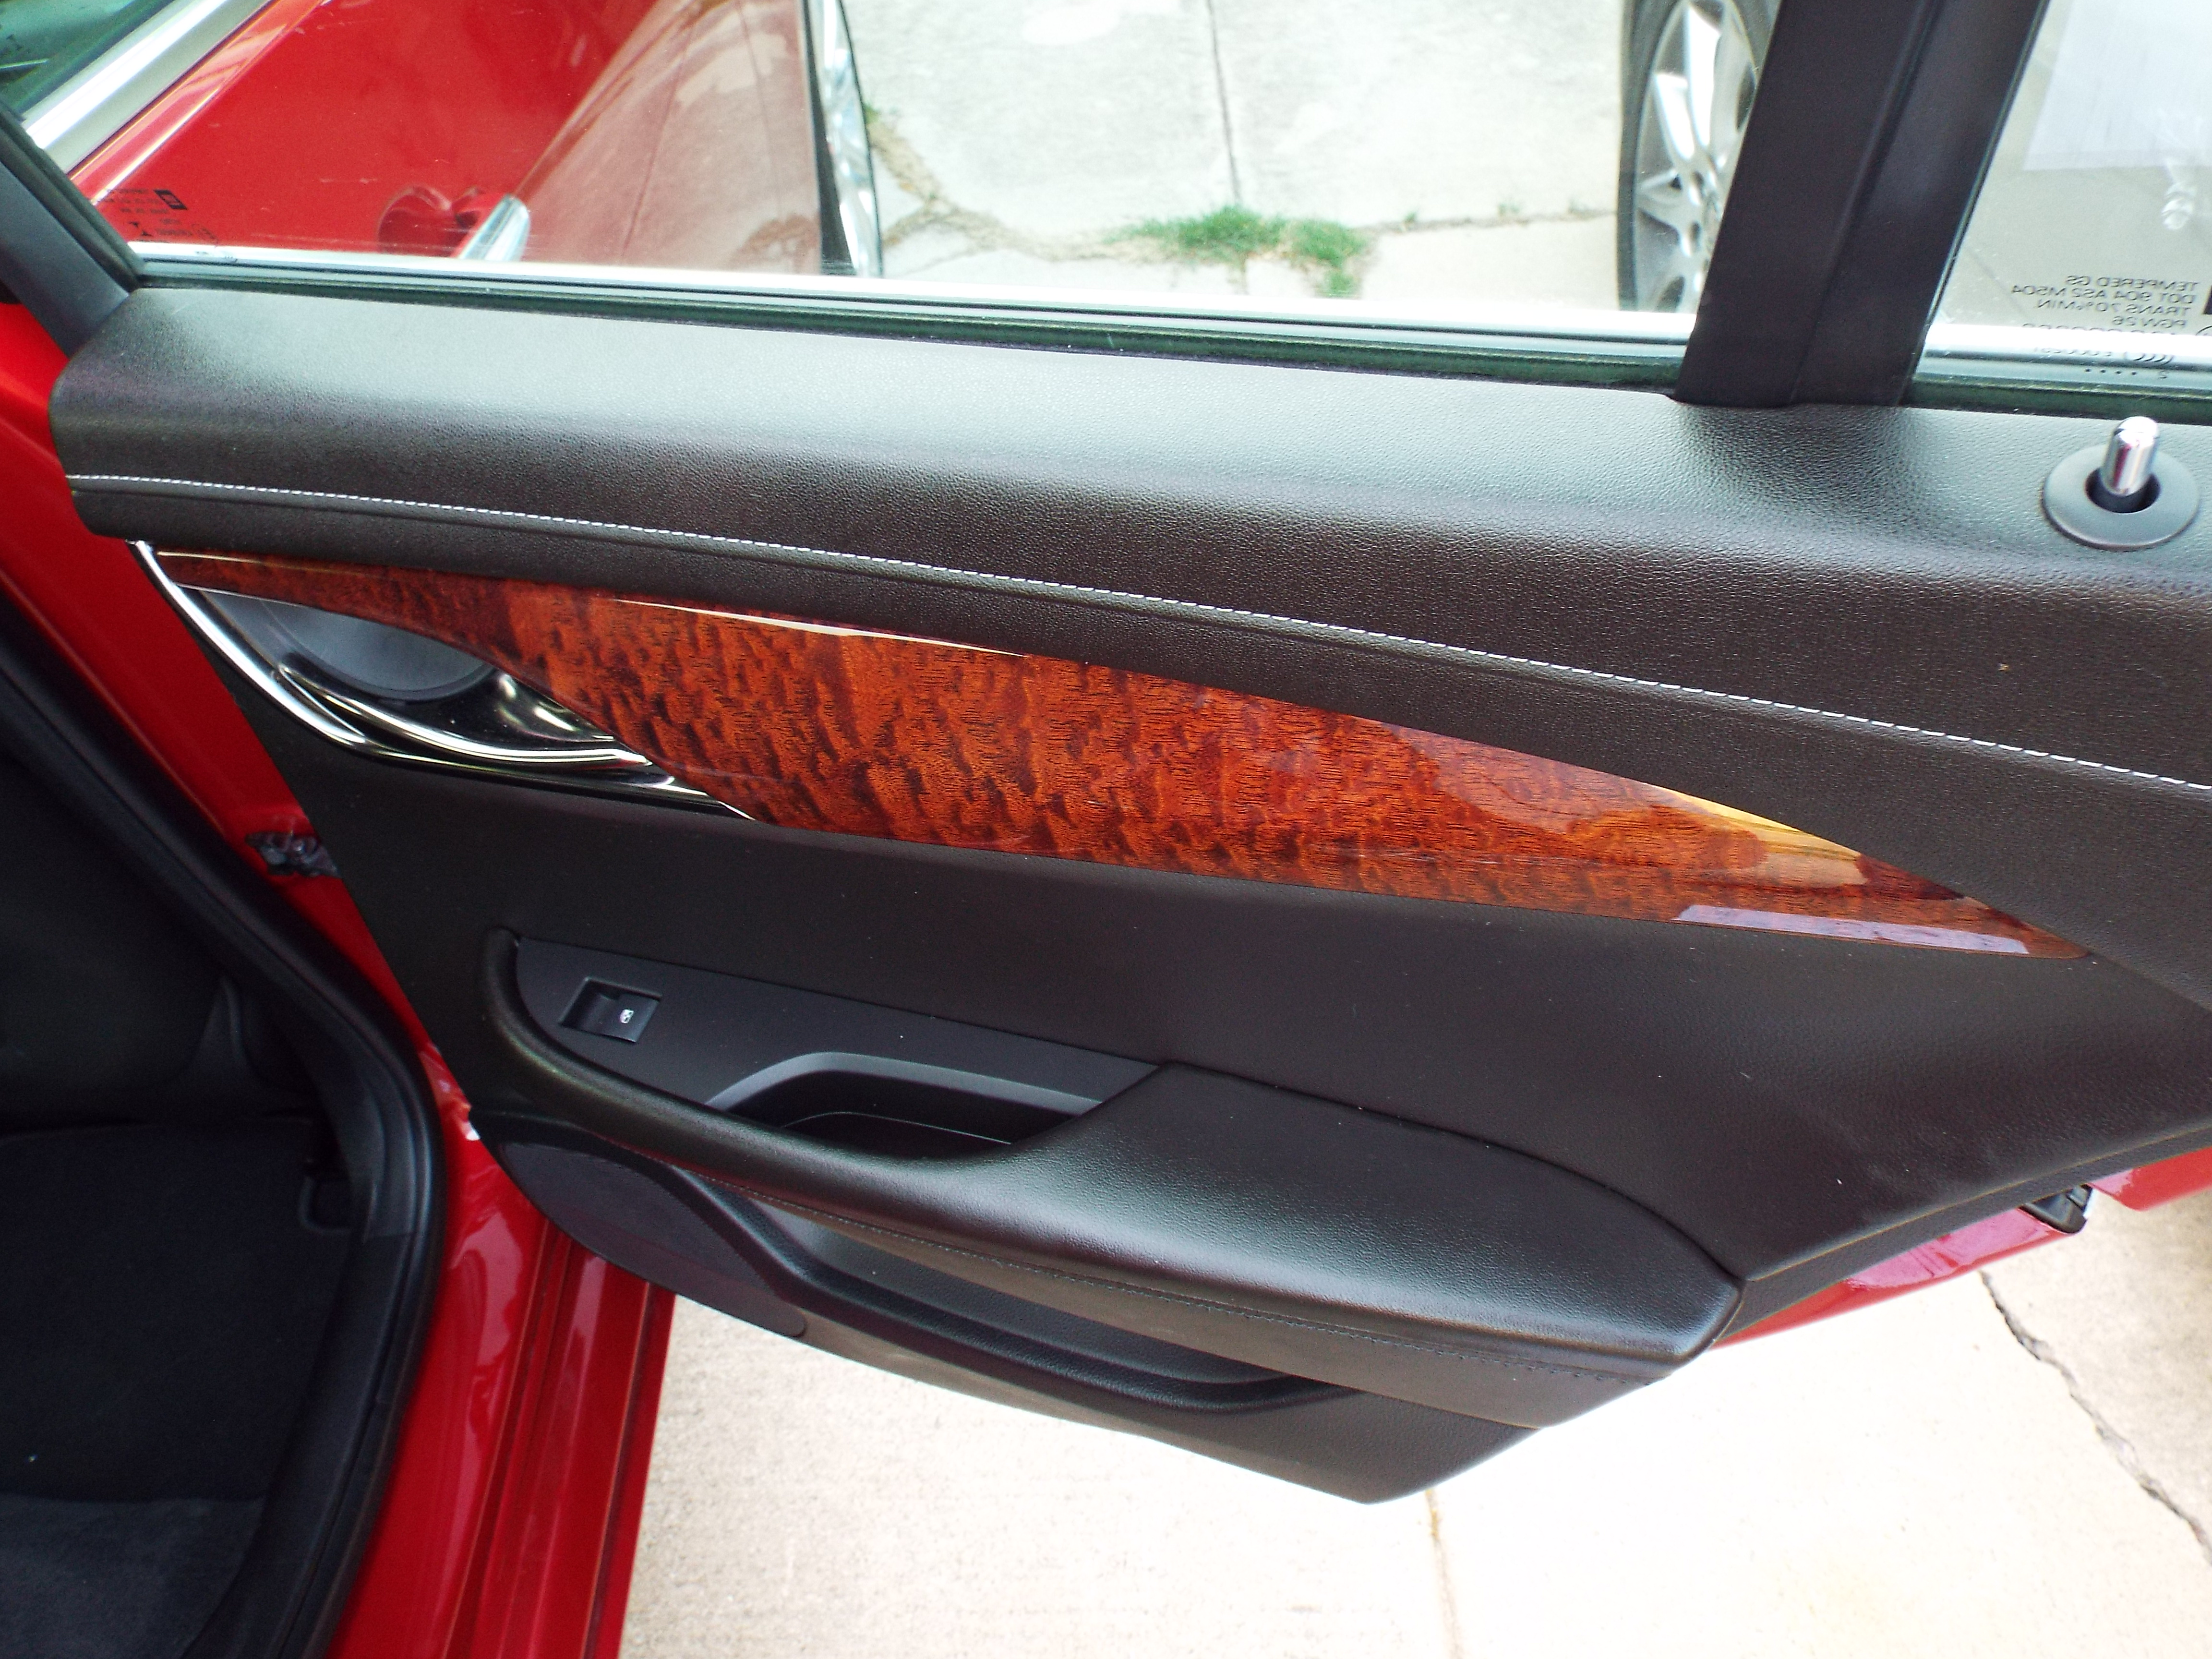
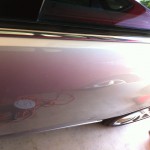
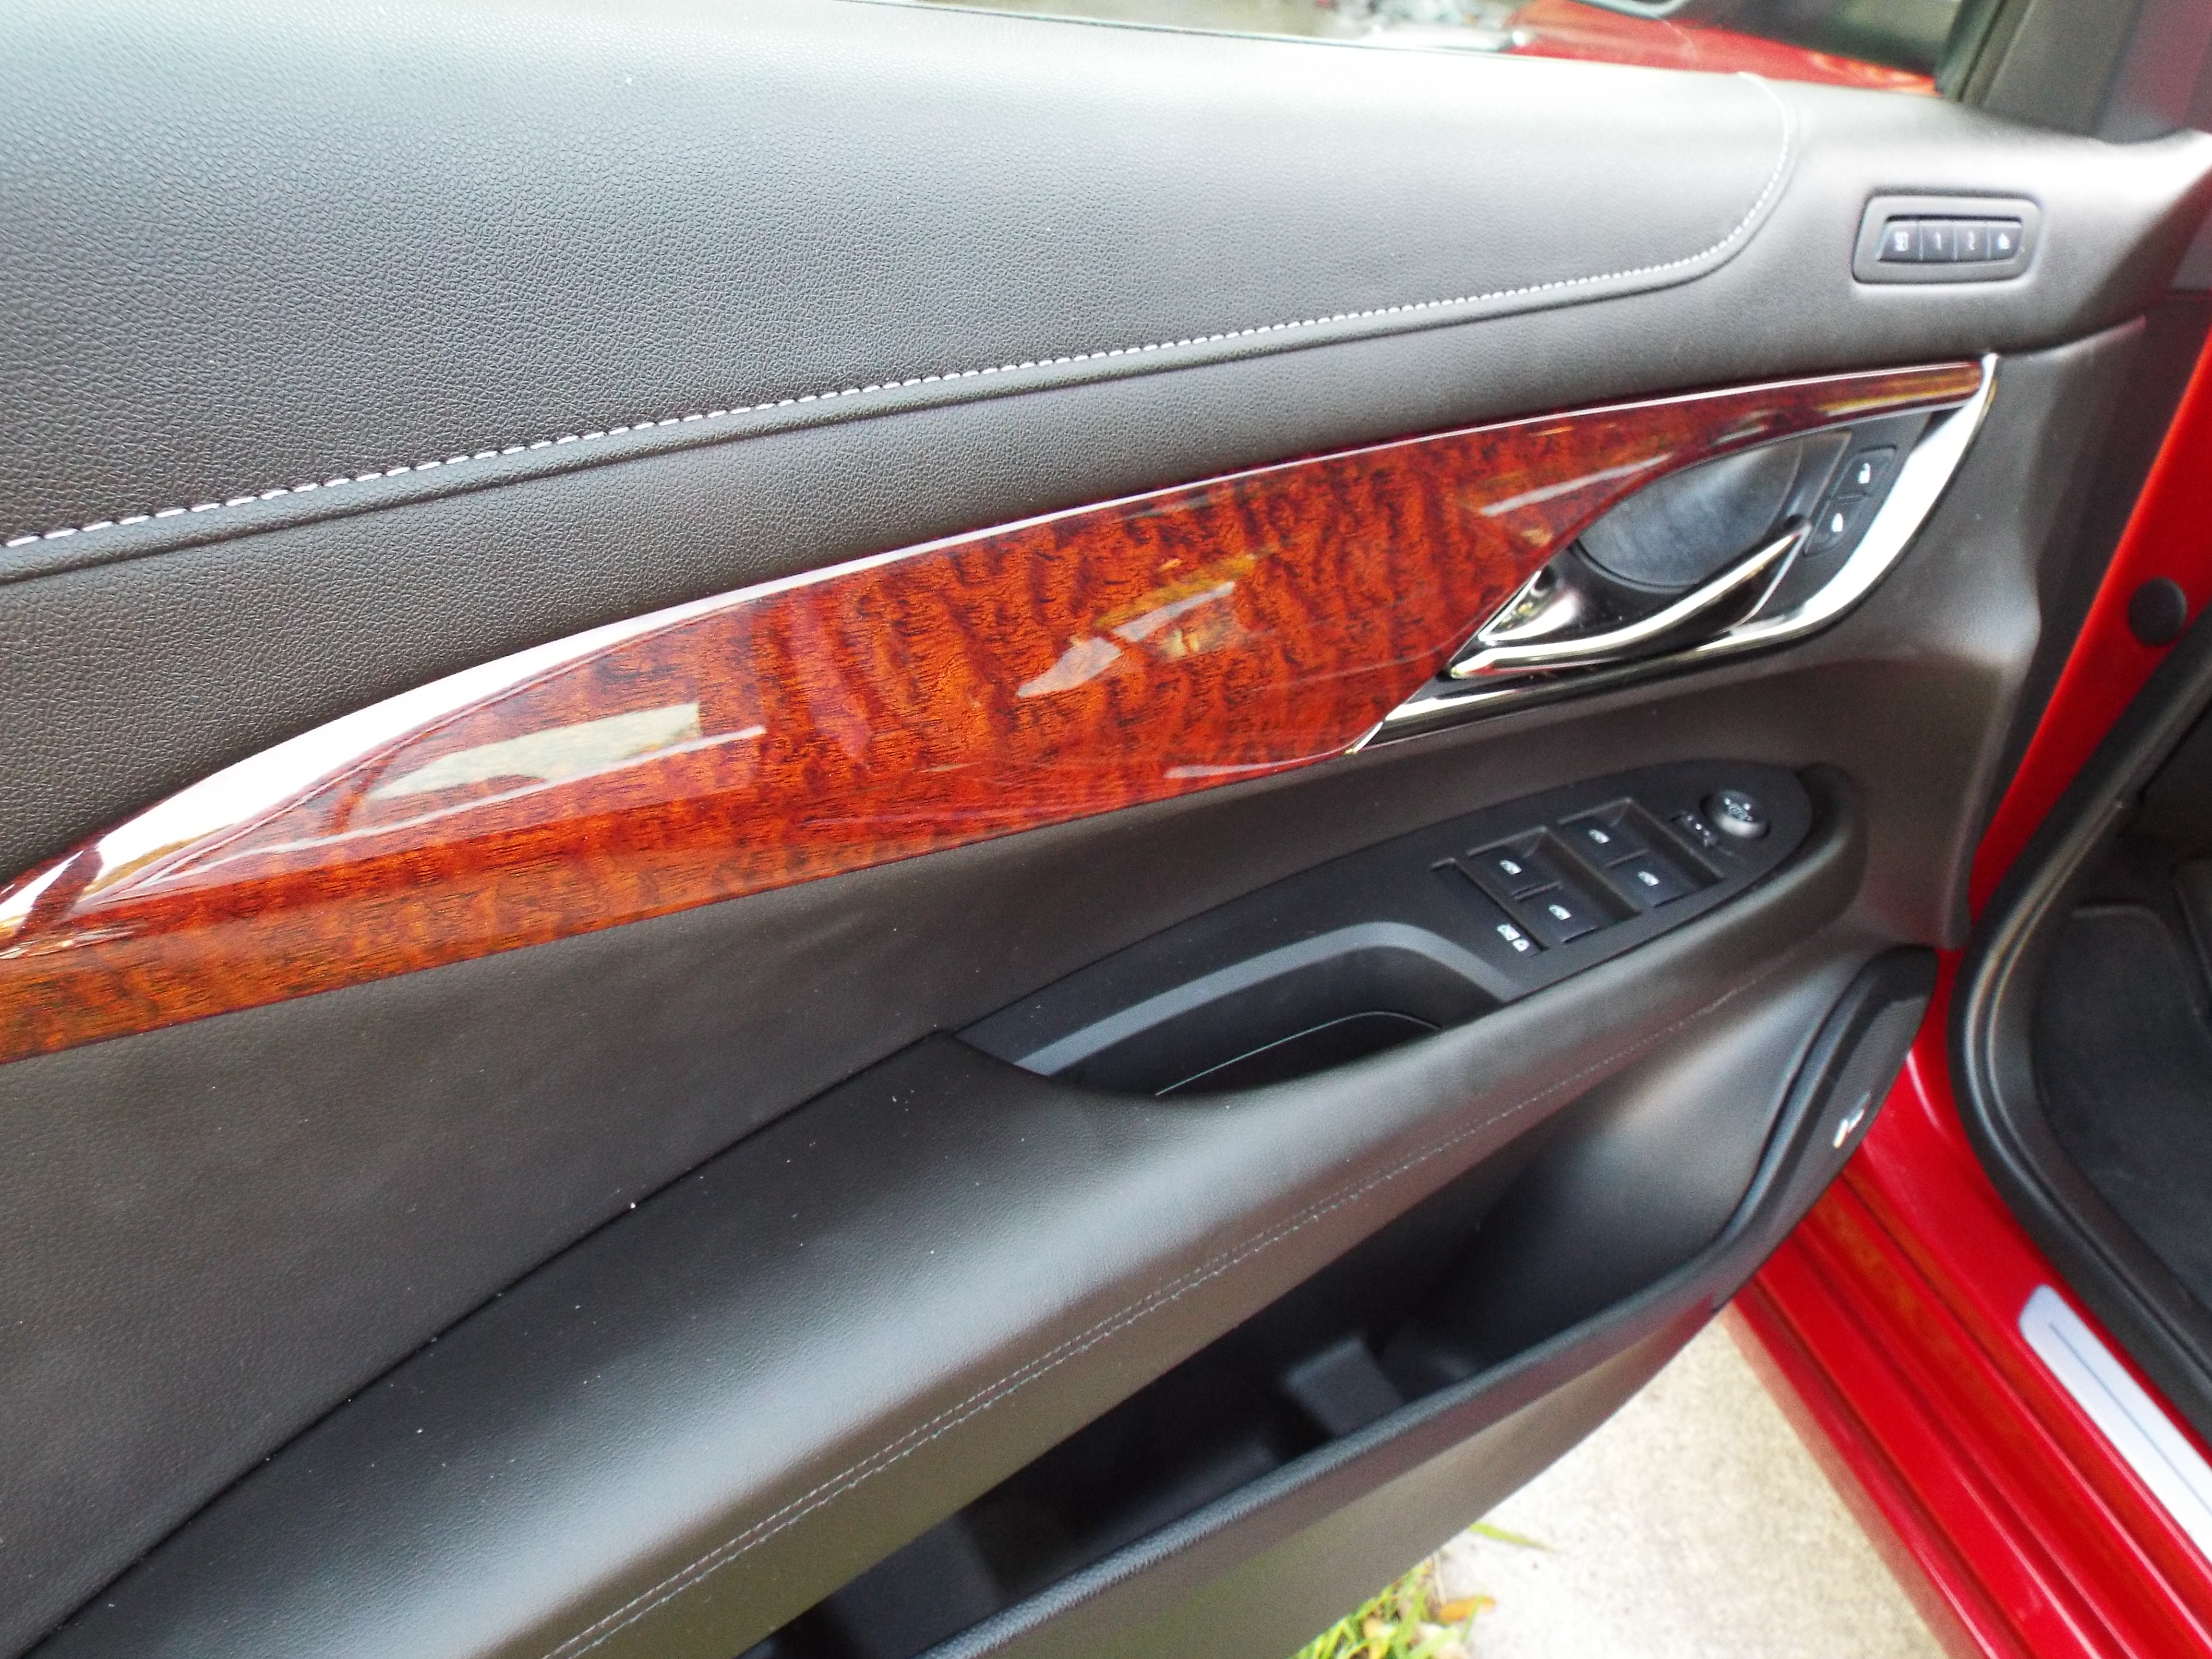
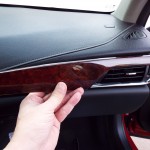
Here is the new Sapele wood insert in place.  Sapele comes from tropical Africa, and is in the same family as Mahogany.

DSCF0301

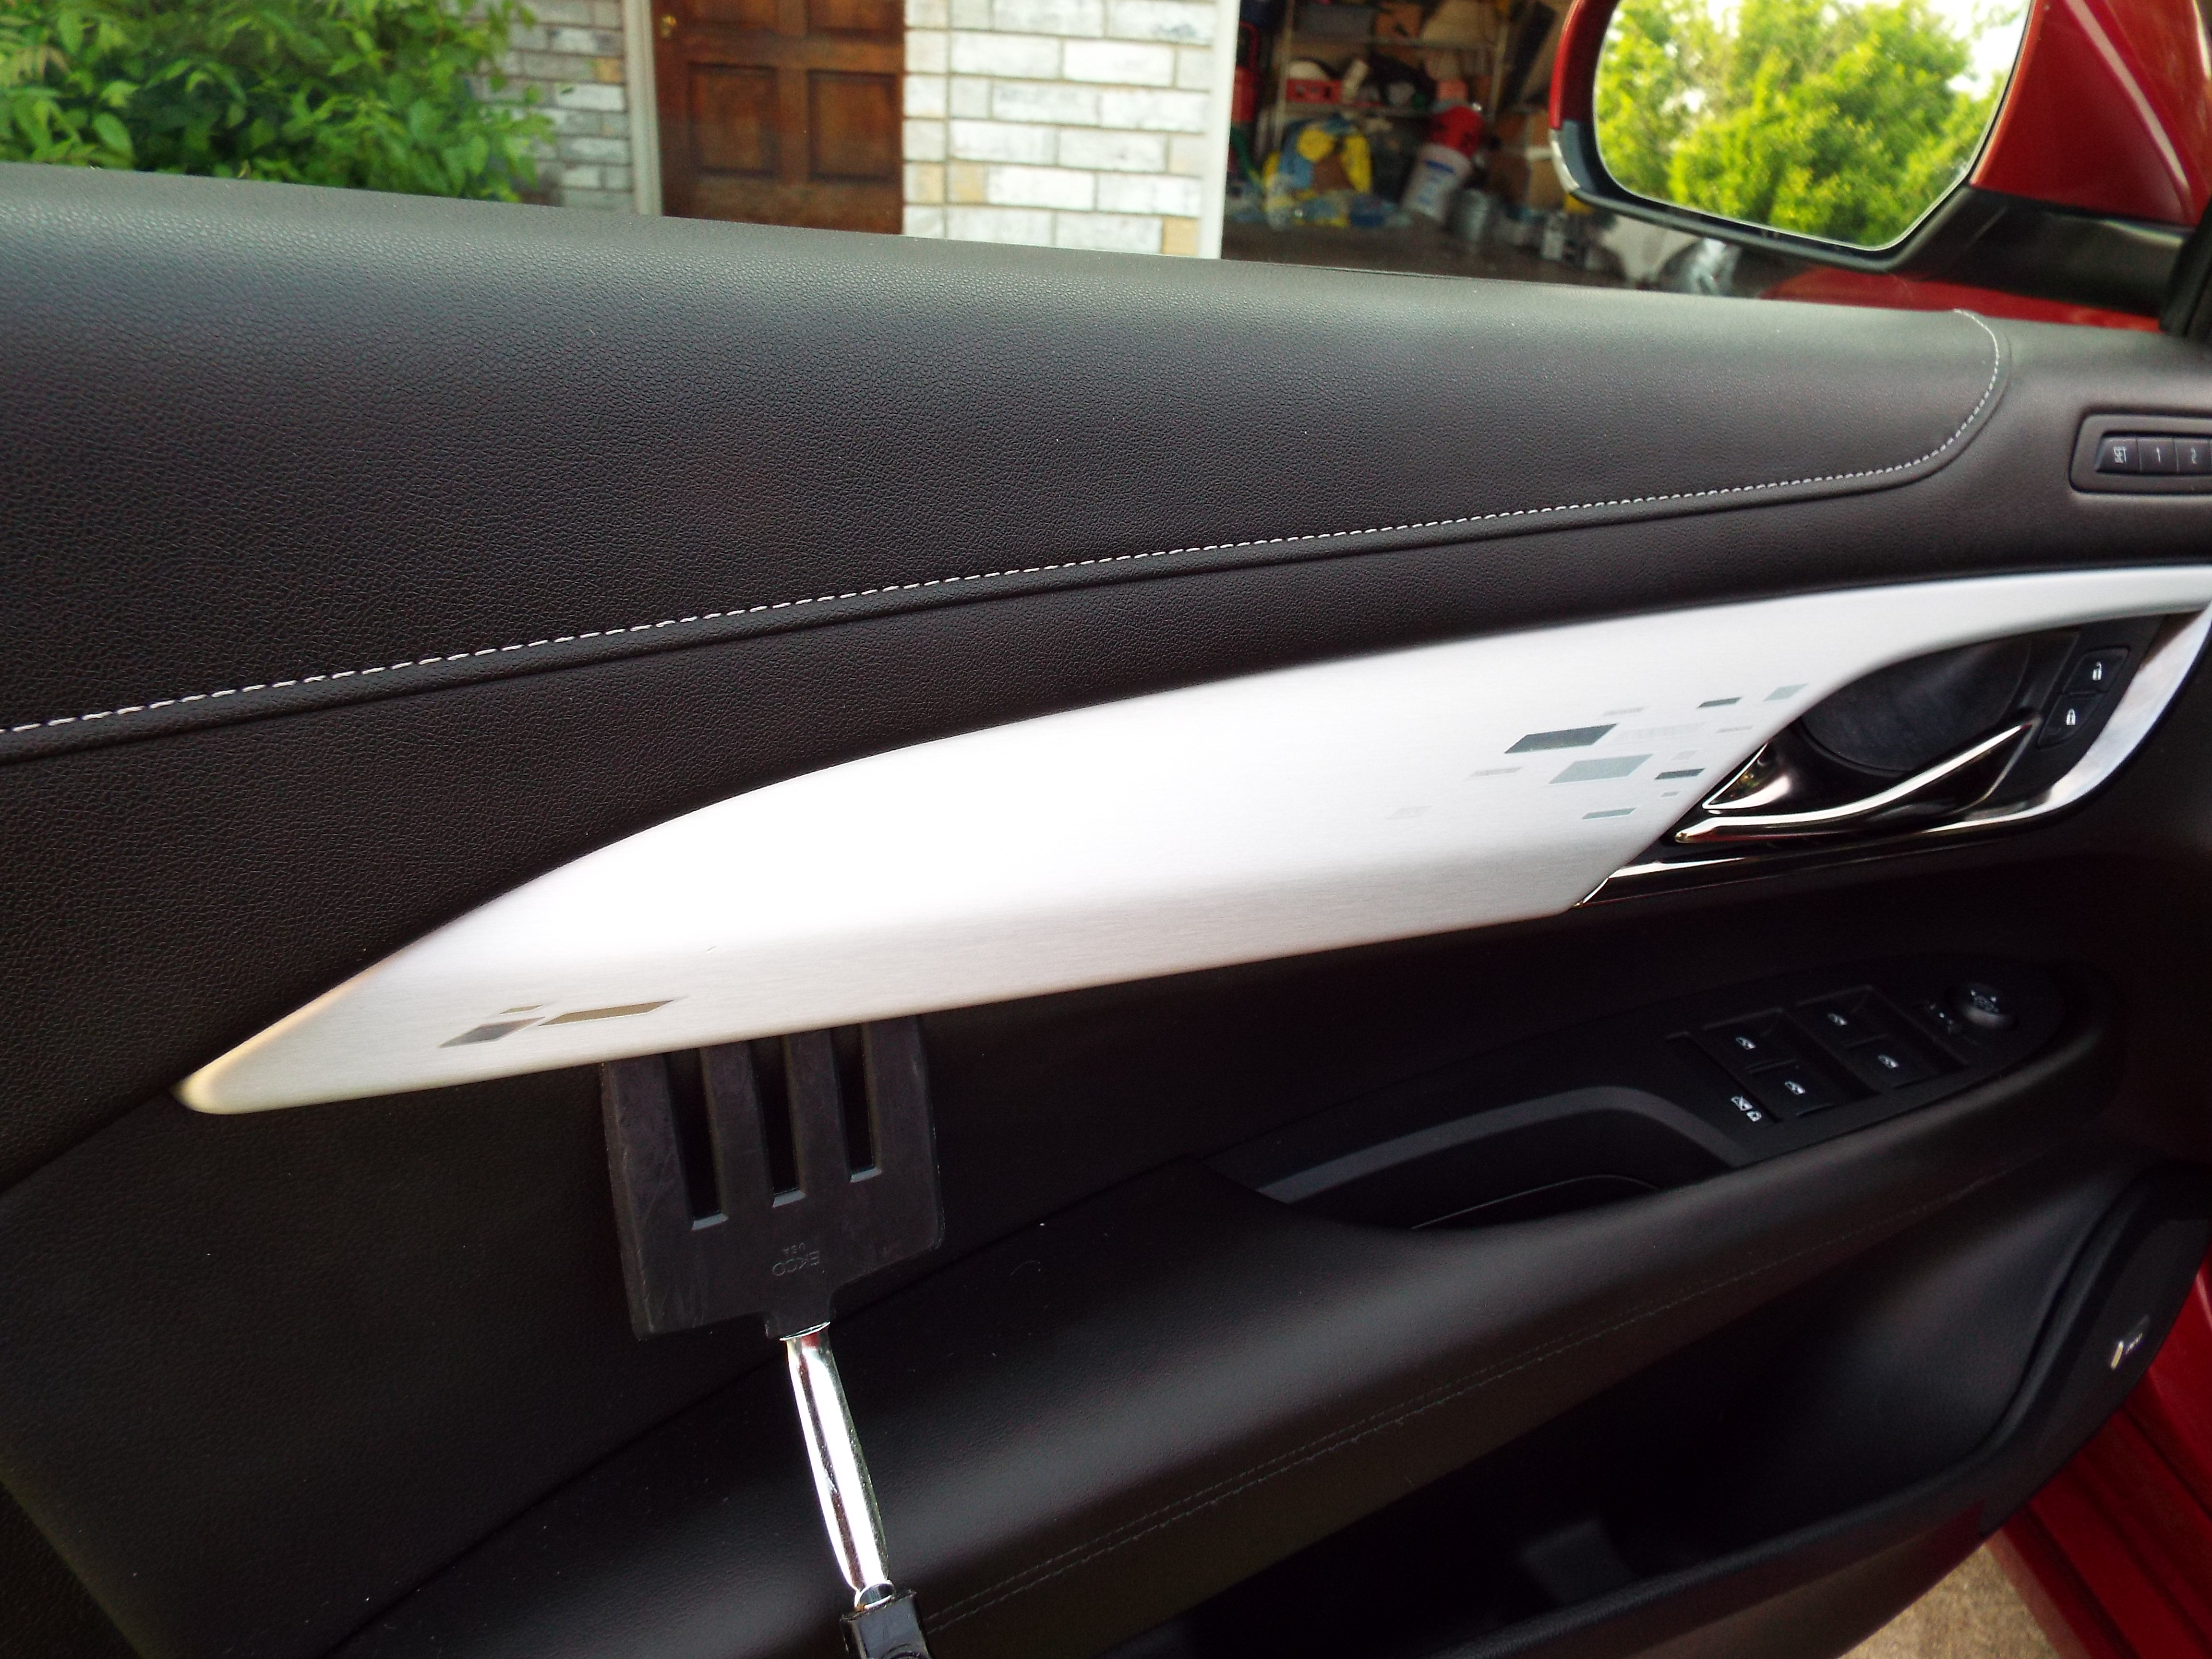
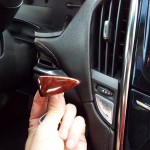
The instructions with the tool show what I assume is a trim tool, with a warning NOT to use a pry tool.  I used a kitchen spatula to get under the trim pieces, then a hard plastic ice scraper to lightly pry the pieces out.  Each piece is tightly retained and takes quite a bit of pressure to get out; I broke part of my hard plastic tool along the way.

On most of the pieces, there are also shaped fingers that one has to take care not to pull straight out.  So in other words, each piece wants to be pulled outward slightly, then slid to the side.

DSCF0306 DSCF0307

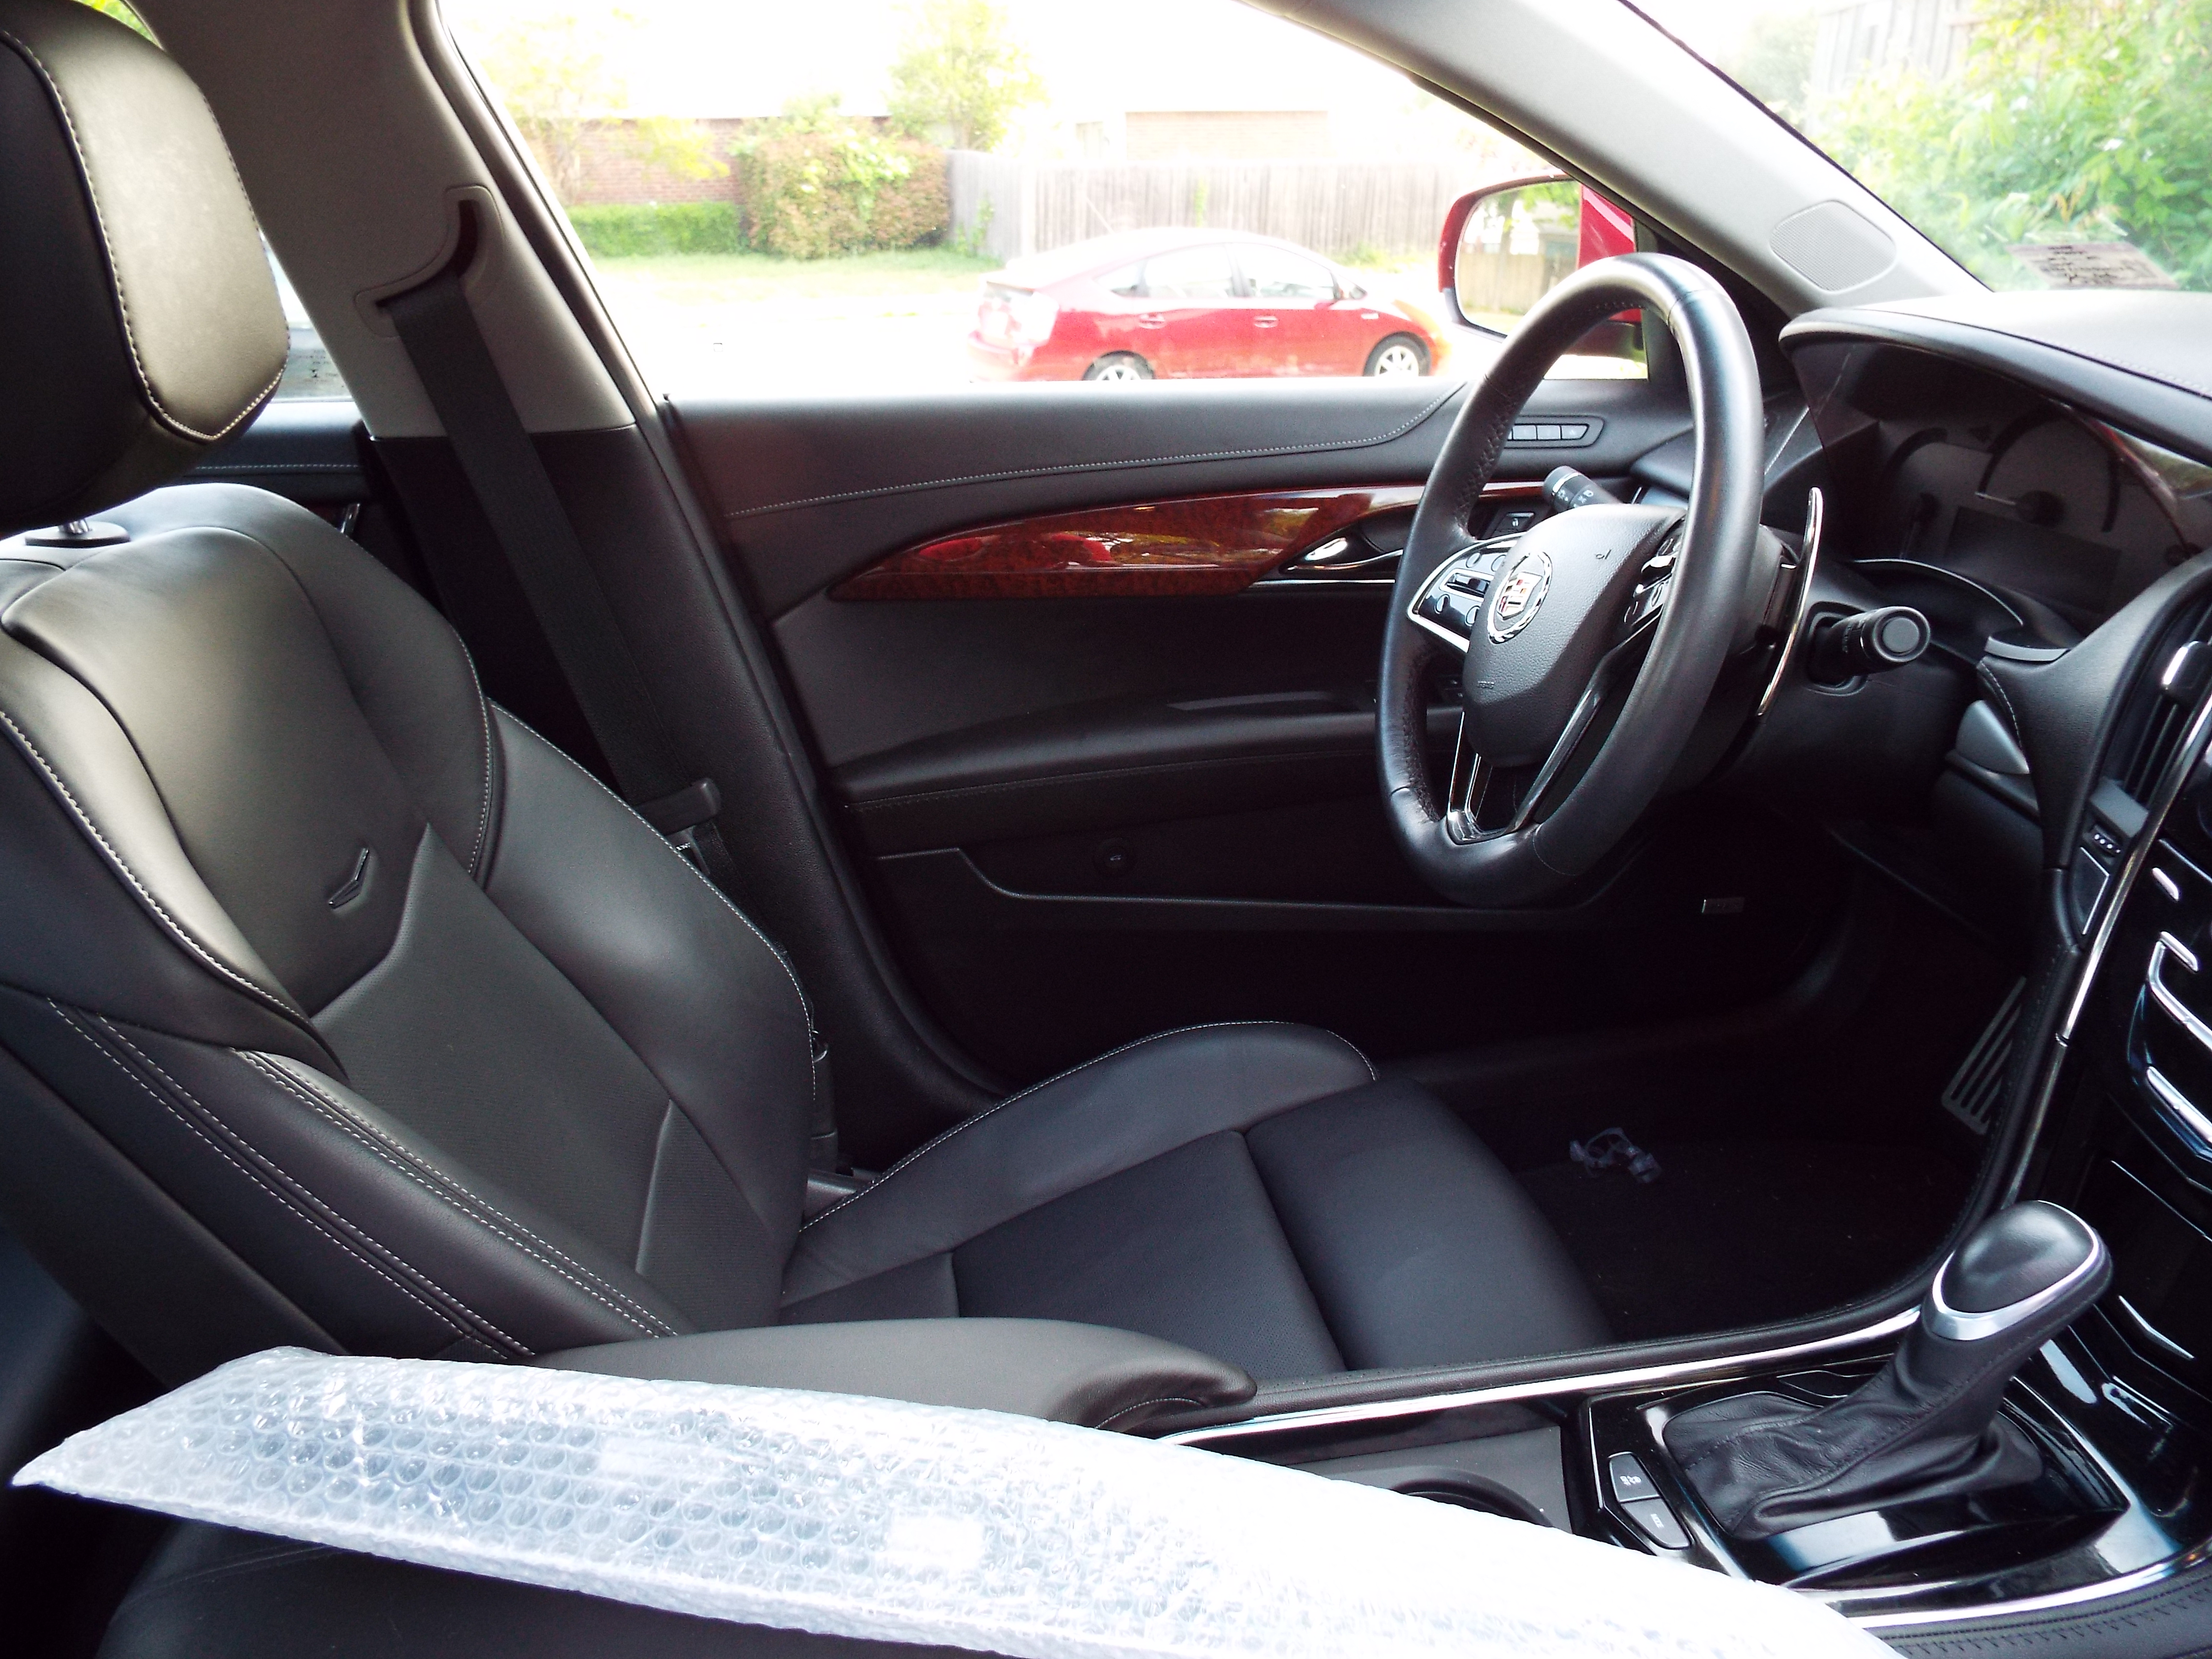
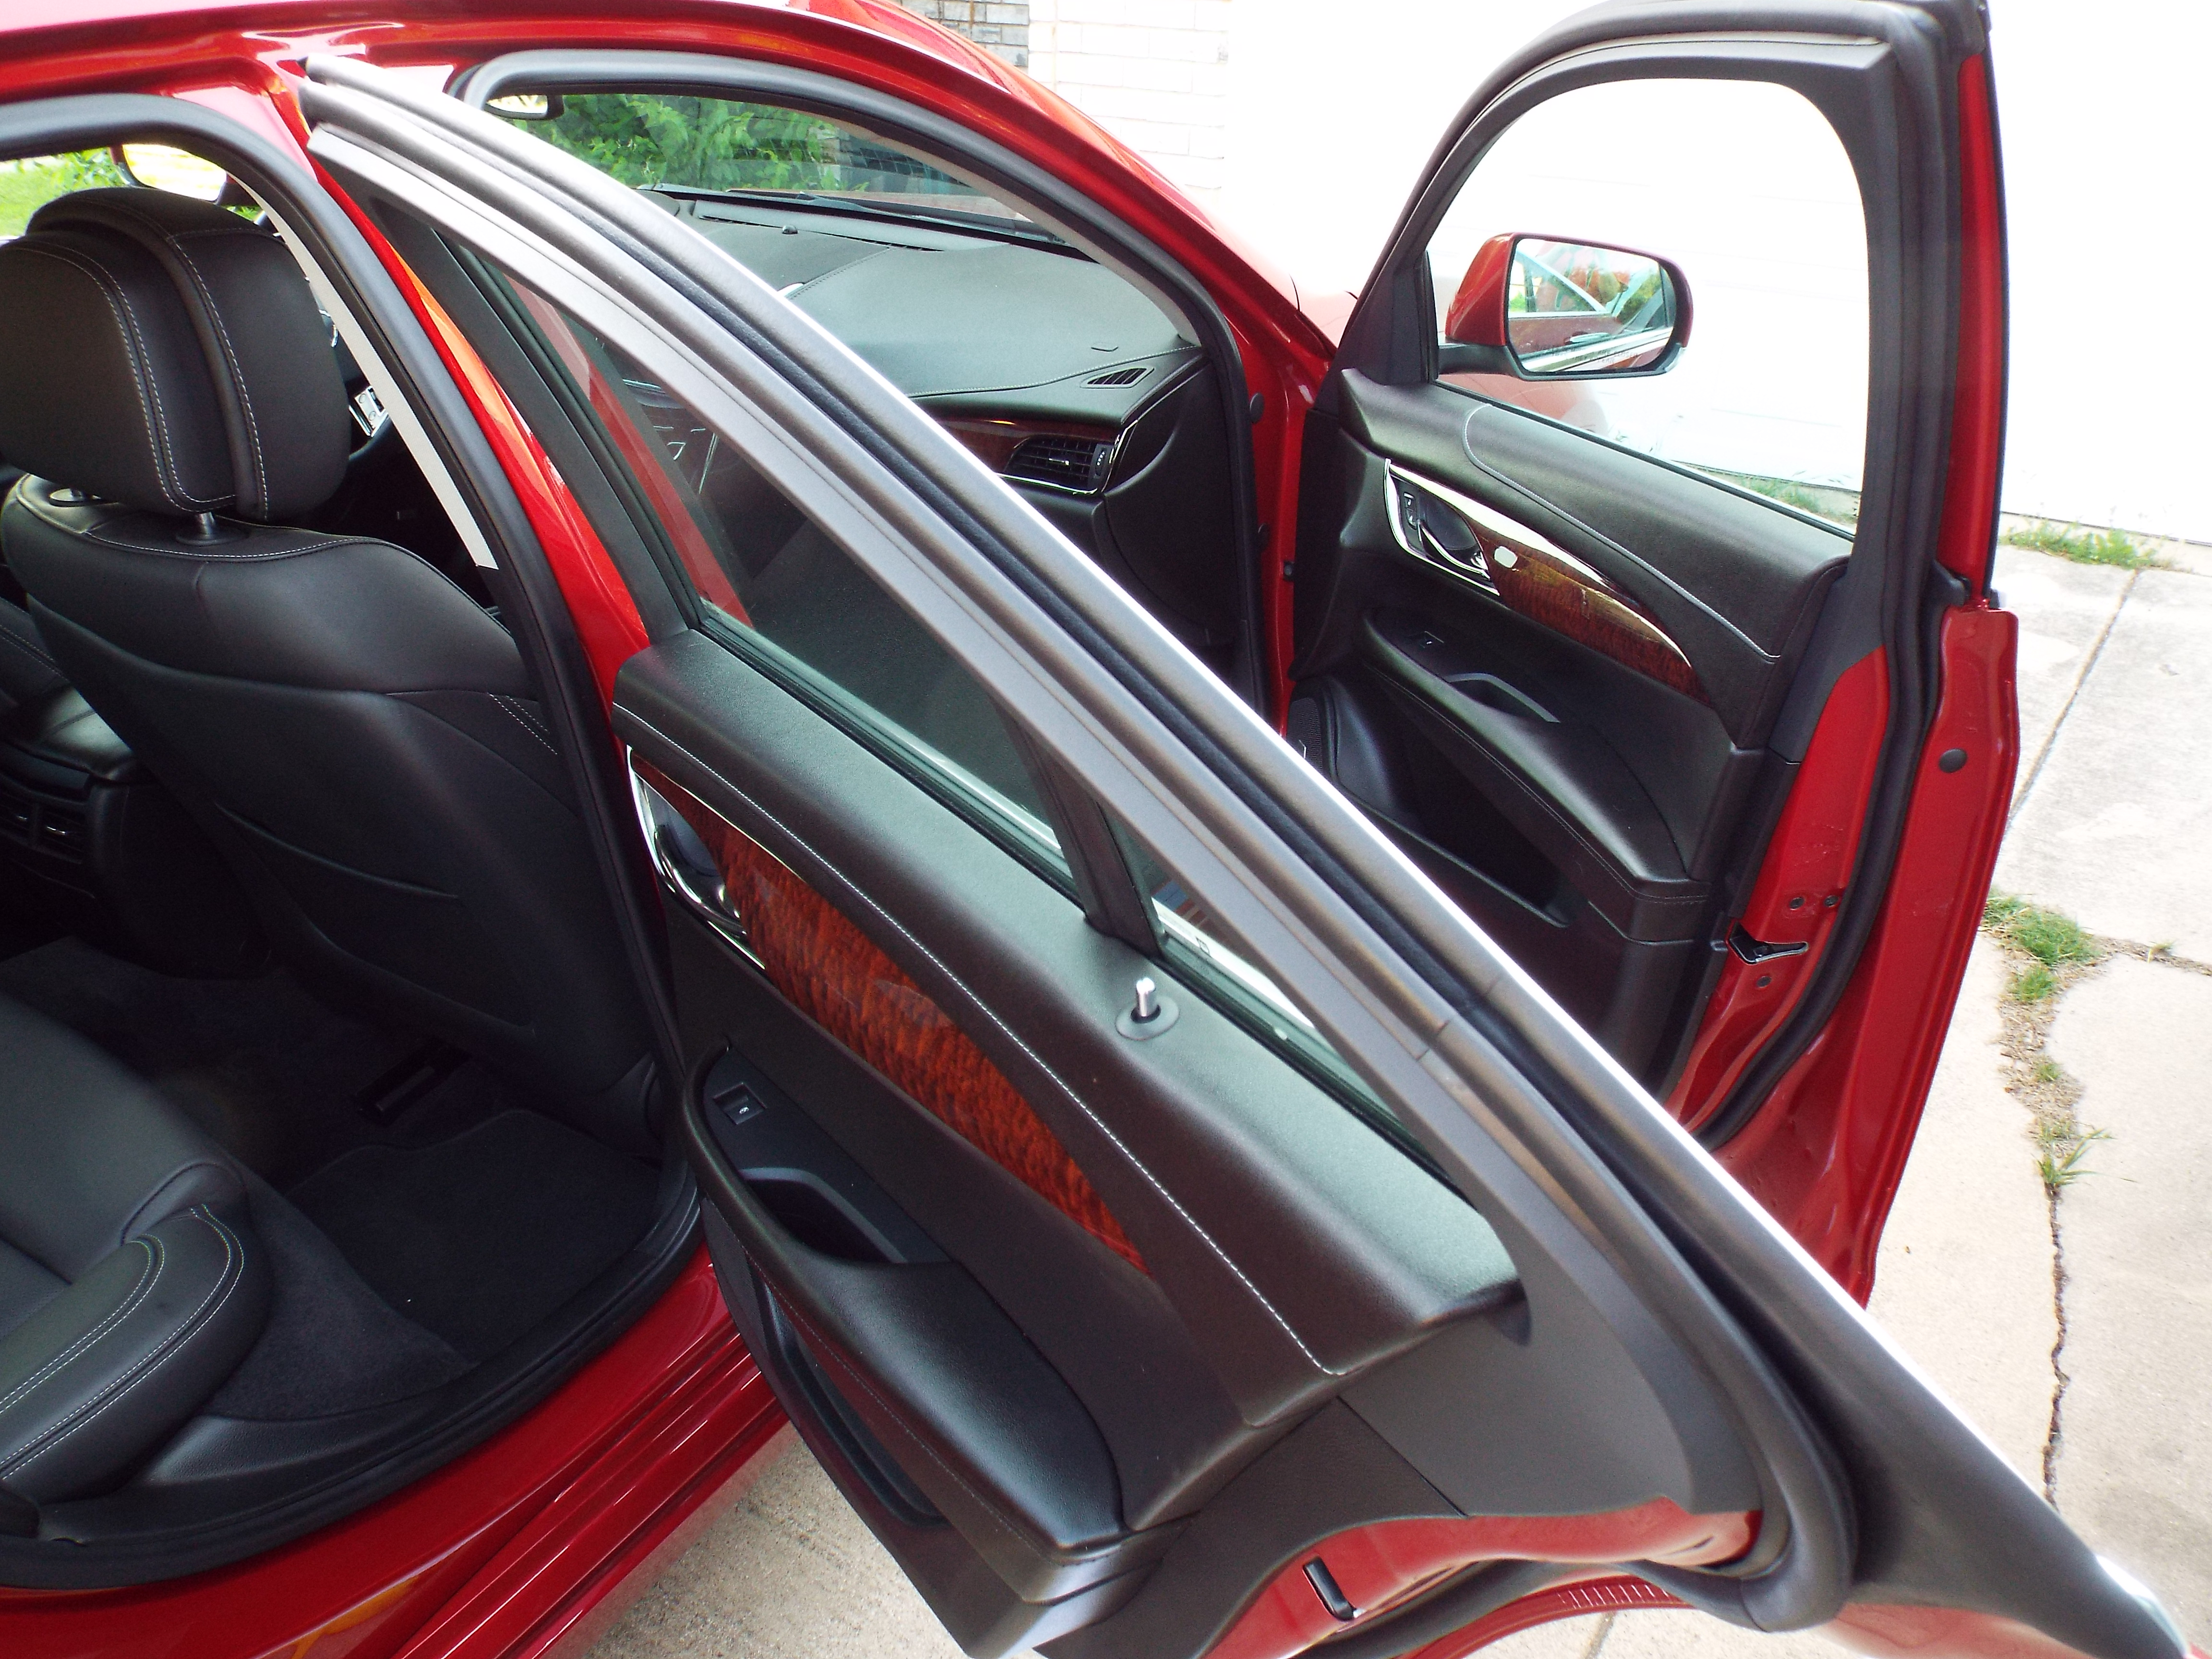
Once I had practiced on the rear doors I felt better about working on the more-visible front doors.  These took a bit more pressure to snap into place, so I was glad to have the confidence from the rear doors for how they would go.

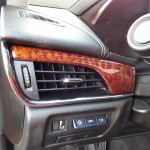
The wood trim piece in front of the passenger airbag is a really good place to exercise additional care, and it seems very fragile, but was one of the easier pieces to swap.

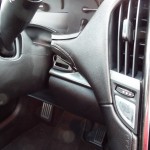
This small triangular piece I thought — “well, if I never get that out maybe she won’t notice”, but once I got my spatula under an edge and then the plastic tool it came right out, and with only one retainer was simple to install.

DSCF0326 DSCF0327

Overall this was not a tricky task, although it does take quite a bit of care.  Slow and easy does it, but also a surprising amount of pressure is needed to ‘pop’ the retainers out, while being careful NOT to pop them complete out so that one can slide the fingers lose before they detach.

My Wife was right, the Sapele inserts look better than the Aluminum for this ATS.

download

Update: my Wife sent me this approval picture from her iPhone 5 — so successful install.

Daily Driver Detailing — Cadillac Rubs #Motorama @Meguiars @Portercable

Let’s talk daily driver detailing. My Cadillac is a daily driver.

IMG_0576

Shot of my 2008 Cadillac STS-V during a recent trip. This is the car we are working on today.

My garage was previously a  storage locker / reality show — it is much improved after a recent clean-up.  This combination was not good for keeping the paint on the car nice and unmarked.

IMG_0602

Before buffing — our target is the black ‘rub’ mark in the rear door.

Today I set out to correct some issues.  One prime candidate was this shoe-polish like smear or scrape on the passenger door.  This appeared to be a large black ‘rub’, not sure from what.  I assume it came along in a parking lot, although it is possible someone opened the door against stuff previously kept between the cars in my garage, or even that it was hit by a piece of a tire at some point (?).

My tools of choice today were a Porter Cable buffer, a cutting pad, and Meguiar’s correction compound.  I used a PC speed of 5K rpm.  First I lavished the correction compound onto the pad, then with the buffer off I brushed with the buffer to spread a coating of the compound onto the spot and the rest of that panel.  With the buffer on, I moved it in a circular pattern across the spot from several different directions.

After Buffing the Rub spot

After Buffing the Rub spot

Although resistant at first, this process cleaned the rub up nicely.  I had to look at the previous photo to see where the rub was & re-position the bottle of cleaning compound for the comparison ‘after’ shot.

I then worked on some other less obvious spots.

Shot of the hood (bonnet) after waxing

Shot of the hood (bonnet) after waxing

Finally, I switched to a waxing pad and finishing wax, and waxed the car by section.  I grabbed this snap looking across the front hood to give an impression.

It still needs some more work & attention, but this was a good start on getting a few items taken care of.  You can just see our chihuahua mix out enjoying the morning in the last photo.  There were other ways to solve these issues, but using the buffer and Meguiar’s compounds was a simple and direct way and was successful in cleaning up or clearing up some of my STS-V’s imperfections.

Advice & Good ideas for Daily Driver Detailing?

Do you have advice on paint improvements?  Hit the comments and share!


Update:  How to tell you will need more product soon:

IMG_0605

It is hard to tell from the iphone pics, but with waxing the Silver STS-V looks increasingly reflective.

I tried to capture a before / after sequence for the rear side view:

The difference is subtle on the iphone.  In person it does look better.


Quick Spray & Wipe Vacation Cadillac Wash

A vacation is like a car show, except your car is the only gearhead entry.

We are in South Carolina visiting from Texas. My Cadillac naturally arrived covered with 1,180 miles of road grime, bugs, dust, and dirt. One might simply head to the nearest car wash on arrival, then touch up. I wanted to try the DIY Spray Detailer on this full car problem including grimey wheels.

20130325-164359.jpg

The wheels in the STS-V get pretty dirty, but are luckily fairly easy to clean.

Today I used the DIY Spray Detailer and microfiber towels, as with the rest of the car. The main difference is I used more detailer as a rinse, I did the wheels last so no grime went back to the rest of the car, and I used the dirtiest towels.

I took this photo midjob so one car see the clean and dirty sections of wheel. All in all, spray on, wipe off.

After shots

20130325-164731.jpg

20130325-164915.jpg

Summary

All in all I am happy with the result. The iphone hides imperfections but the V looks clean in person as well. Bringing along a bottle of spray detailer and a bag of microfiber towels seems an easy vacation addition.