DIY Spray Detailer Test 2

Today I had a good opportunity to retest the DIY Spray Detailer.

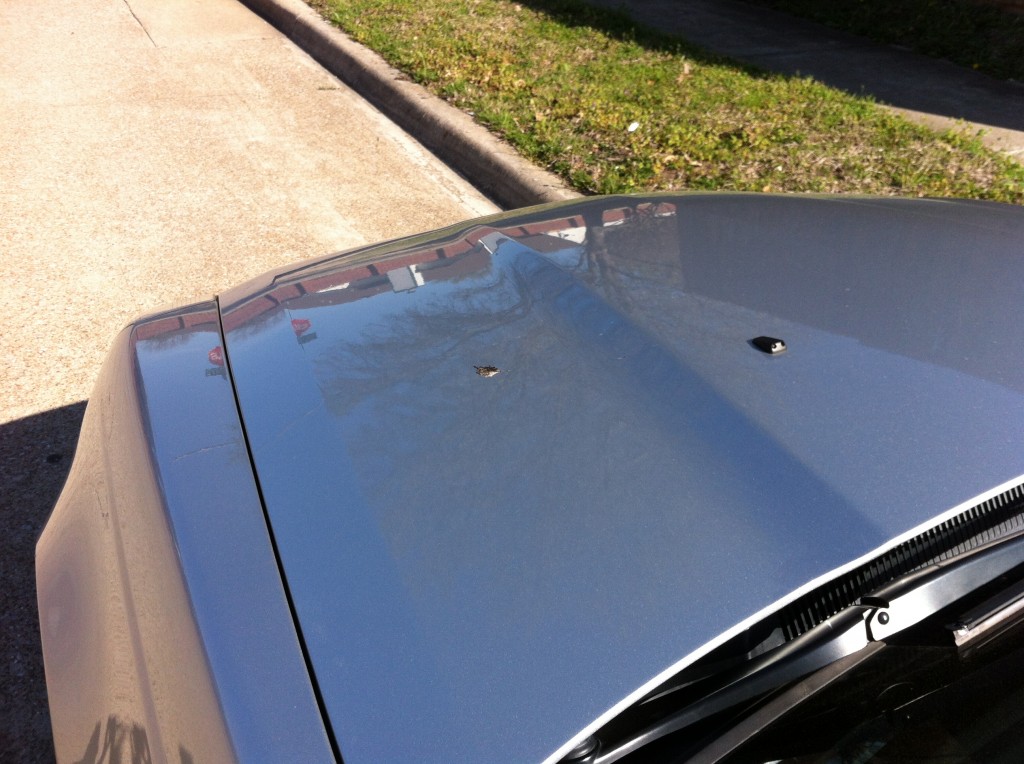
STS-V hood with offending debris

STS-V hood with offending debris

On the hood (bonnet) of my Cadillac STS-V I found a patch of bird debris that needed to be removed.   Bird poop can be quite harmful to paint.  The hood was also covered in a light dusting of, well, dust.  I live in Plano, Texas which intended to be a prairie and not a suburb, so we get dust.  The hood needed a good spritz rinse, bird poop removal, and clean-up.

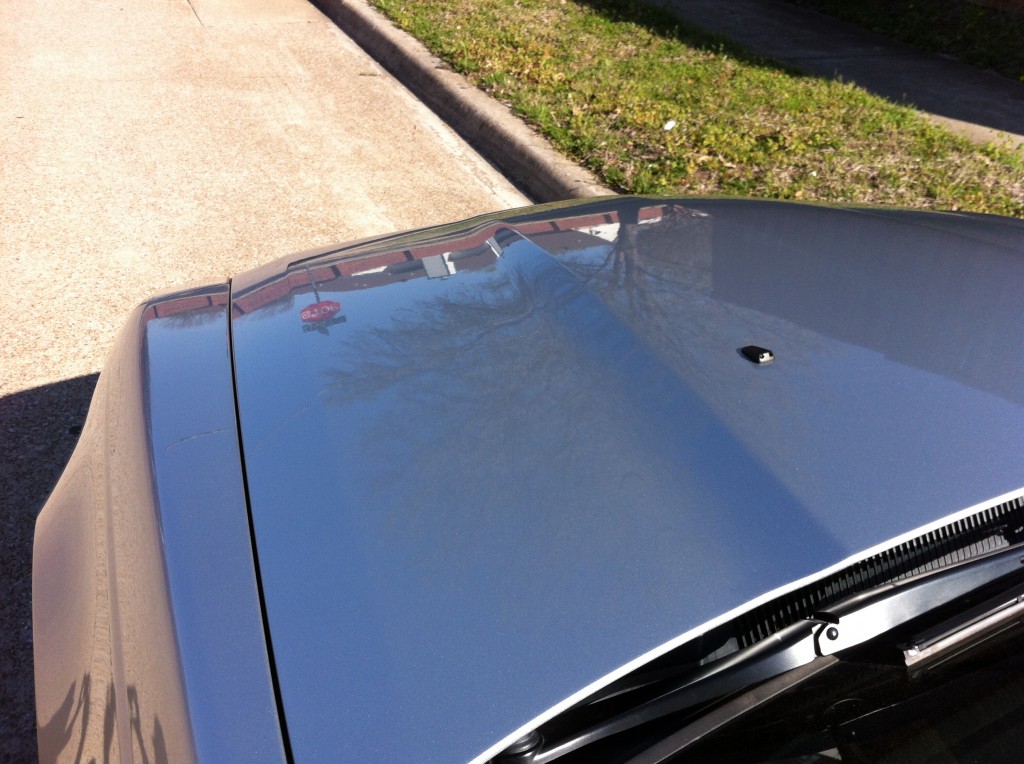
STS-V hood after DIY Spray Detailer spritz, microfiber cloth wipe

STS-V hood after DIY Spray Detailer spritz, microfiber cloth wipe

I adjusted the nozzle on the spray bottle to allow a good stream first, to rinse and break up the debris field.  Then I adjusted to a spray pattern to fog the entire hood. Finally, I used a microfiber towel to wipe and dry the hood.  Spray on, wipe off, easy, done.

My impression is most spray bottles have this sort of adjust-ability for pattern of spray, but the specific bottles I got were from Sam’s Club in the auto parts or industrial supplies area.

The results is a clean, good looking hood free of bird poop and ready for action.

DIY Remove Dealer Emblems from Your Car

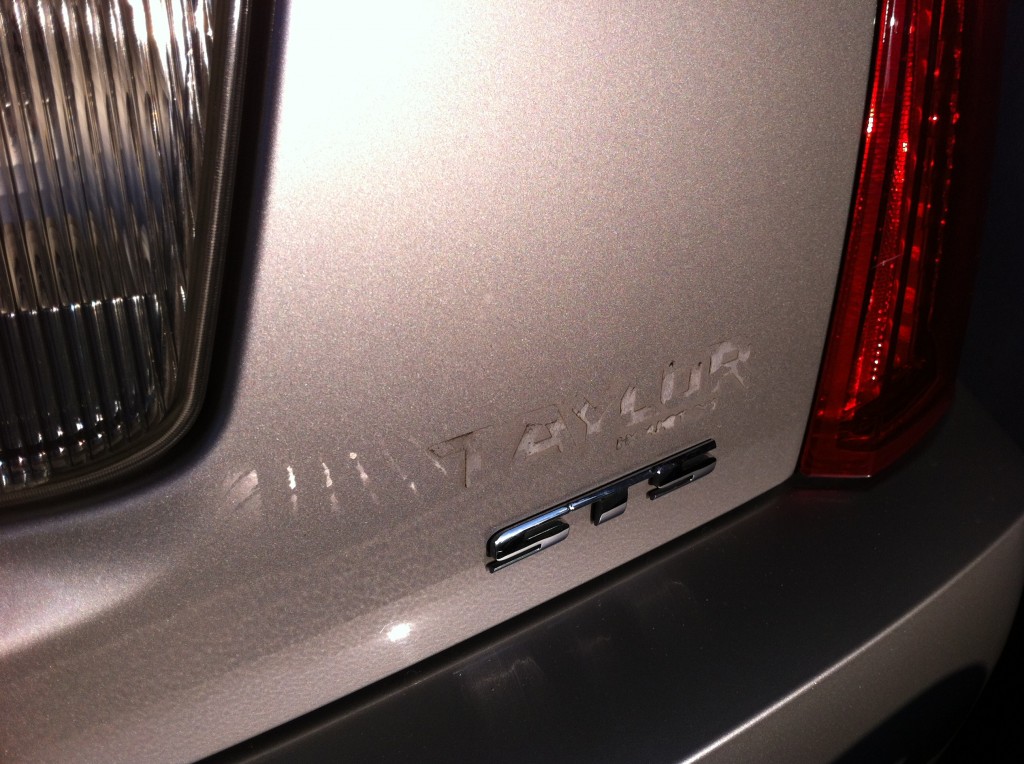
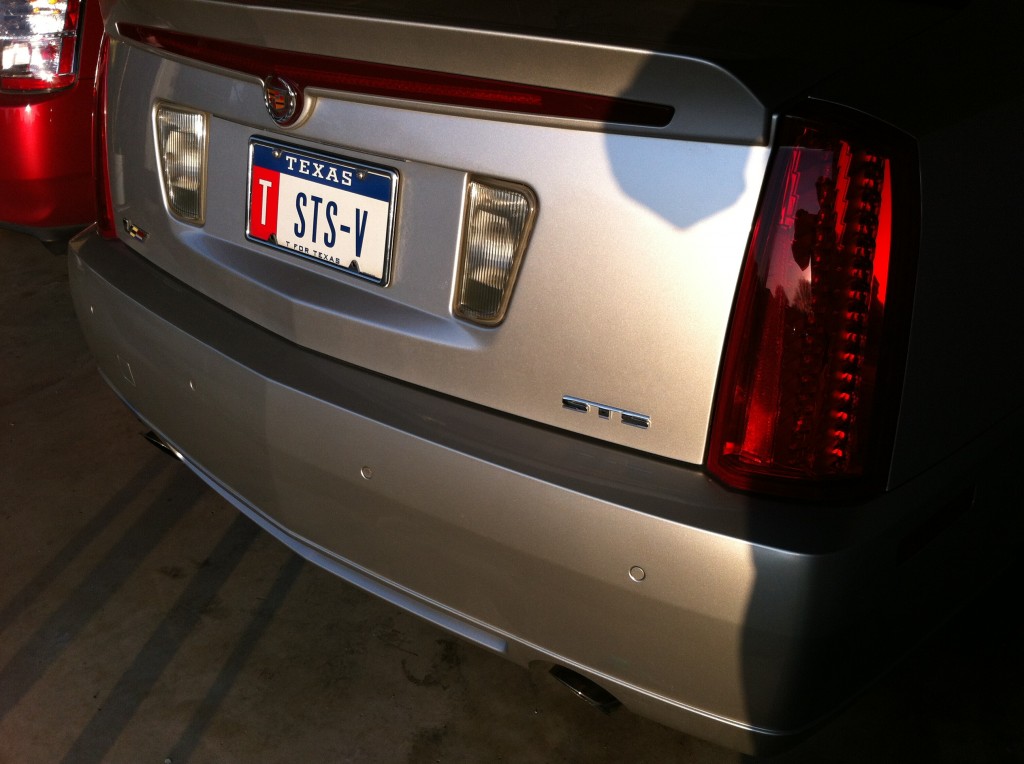
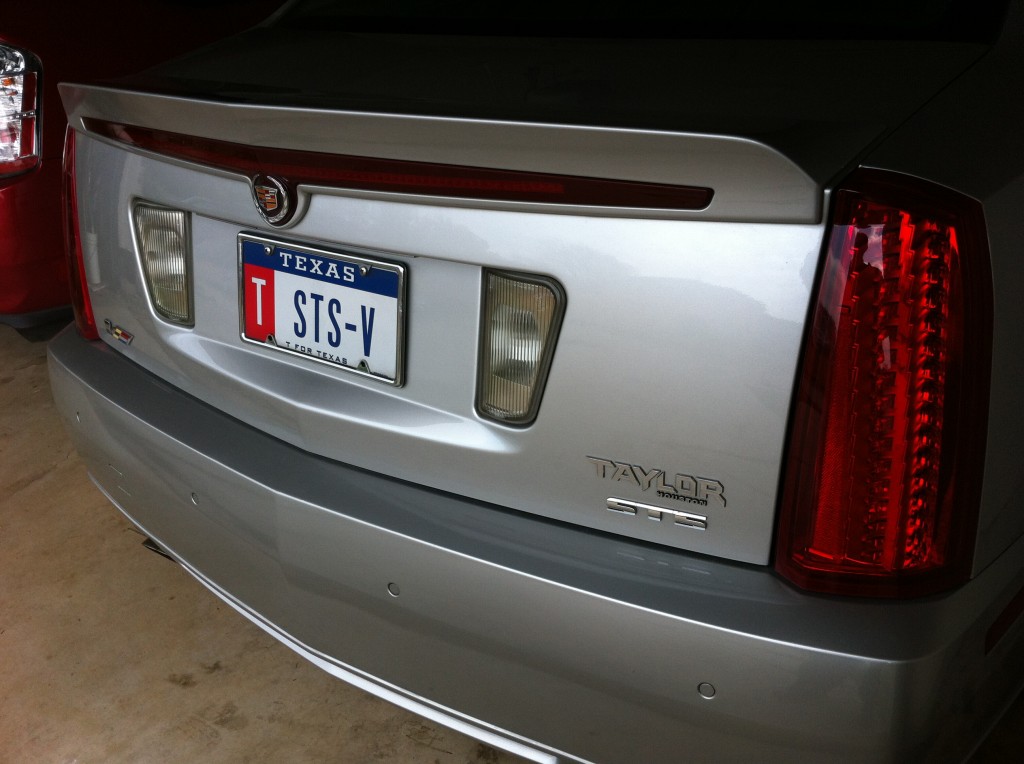
My 2008 Cadillac STS-V came with a Dealer emblem on the trunk lid.  Today’s project was to get that off and enjoy the clean rear that Cadillac intended.

I want to keep the V logo, and the STS.

IMG_0356

Our targets are the “TAYLOR” and subtext “Houston” emblems.

Tools / Materials:

  • Dental floss
  • adhesive removal chemicals or (alternate) car shampoo solution
  • water
  • More dental floss

How to remove dealer emblems

  • Take photos for Before
  • Wrap a long strand of dental floss around your fingers, as if you planned to floss.  Perhaps more than you normally would use.
  • Slide the middle of the floss under one edge of the lettering or emblem to be removed.

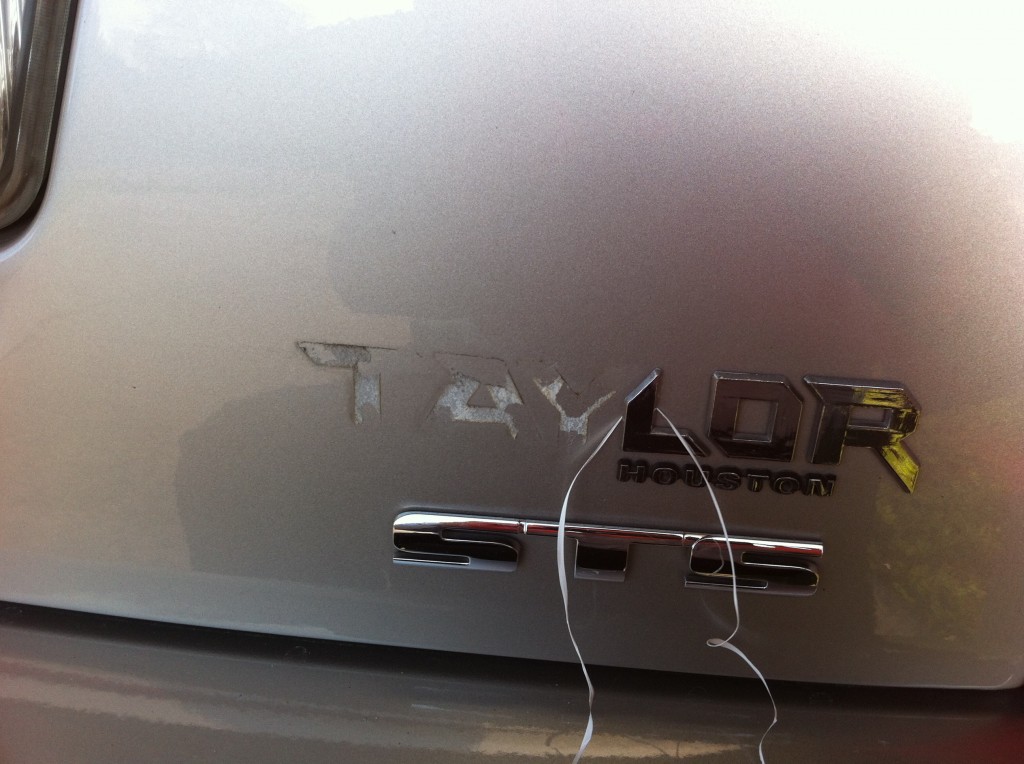
    Using dental floss to saw through the adhesive pad attaching the dealer emblem

    Using dental floss to saw through the adhesive pad attaching the dealer emblem

  • Saw with the floss in a back and forth motion, applying slight pressure downward on the floss.  We are trying to saw through the rubber-like adhesive holding the lettering or emblem to the car.
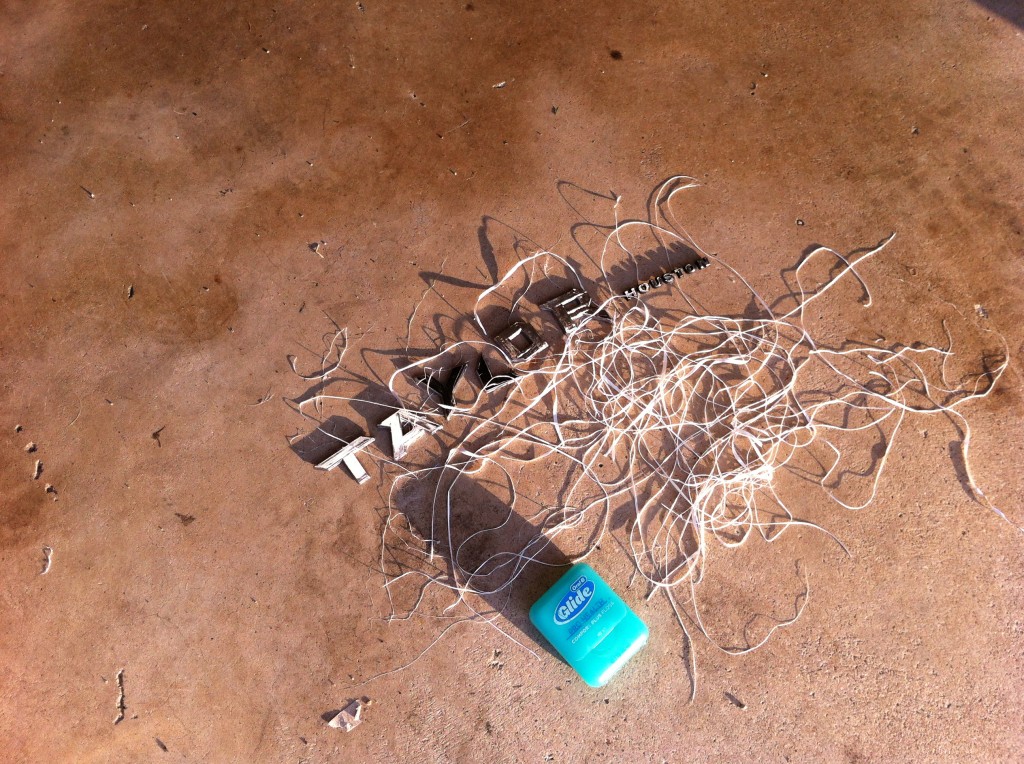
  • Use a new strand of floss once the floss breaks.  Floss is pretty cheap, so use a new piece whenever needed.

    Lots of broken dental floss and discarded Dealer Emblem

    Lots of broken dental floss and discarded Dealer Emblem

  • Once you have the lettering/emblems off, there is probably going to be some adhesive still left on the car where the lettering or emblems were.

    With the emblems removed, there is residual adhesive ready to be scrubbed off

    With the emblems removed, there is residual adhesive ready to be scrubbed off

  • Using the car wash solution and water on a microfiber towel, wash and scrub the adhesive until it washes off the car.  3M actually makes an adhesive removal product that probably makes this easier.  I found that using my DIY Spray Detailer (car wash and water) the adhesive scrubbed off with some effort.
  • Clean up
  • Take photos for After
After successful Dealer emblem removal

After successful Dealer emblem removal

Bruce: How do you know the DIY Remove Dealer Emblems Works?

You can see in the pictures this is the process I used to remove the emblems.  Your paint, car, emblems may present some issues I didn’t have.  But if I were doing this project again I would follow the same process.

Problems you might run in to:

When I asked the Cadillac Dealer to handle this for me, the Service Writer suggested that sometimes the paint underneath the emblem/logo has aged differently than the surrounding paint, which effects the appearance.  I don’t see that issue on my STS-V.

 Speak Up!

Have you successfully removed emblems other ways, or had an emblem removal not go well?  Speak up and share in the comments below!


DIY Spray Detailer Cadillac experiment

While Jims_97_ETC was in town to pick up his 2011 Cadillac CTS-V,  we were discussing the  topic of spray detailer.  I actually meant to pick up a bottle of spray detailer to tuck in his Cadillac for the drive back, but didn’t get that done by Saturday.
IMG_0356

Spray Detailer is a product used for touch-up clean-up of an automobile when you don’t have time or need a full wash.  So let’s say you get a new, clean car, and get one spot on it on the way back home.  You’d spray just that spot with the spray detailer, then wipe off with a micro-fiber towel, and the car would be clean again.  No muss, no fuss.

The spray detailer provides a quick spot-rinse, soap to lubricate and lift the dirt, and liquid wax to provide some shine.  A microfiber towel helps pull the dirt off the vehicle without scratching the paint.

Spray Detailer is relatively expensive, costing around $8 for 16 oz of the stuff.  When I was trying to describe to Jim the goodness of Spray Detailer it occurred to me that I should have been able to just hand him a spray bottle with water, wash & wax concentrate, and mark it ‘done’!  Why buy when you can DIY (do it yourself)?

Materials:

  • Professional quality spray bottles (Around $5 for 6 at Sam’s Club)
  • Car wash concentrated solution, especially a wash & wax solution
  • Clean Water
  • Microfiber towel

Recipe:

Follow directions on the car wash solution for dilution — basically add 1 or 2 ounces of car wash solution then fill up the rest of the spray bottle with water.
Mix thoroughly.  I actually used Turtle Wax Concentrated Car Wash (will not spot or streak) that I had a gallon of in the garage, and tap water.  Filtered water would be a reasonable mod here.

Use:

Spray the DIY Spray Detailer on the problem area / bird poop / dirt.
Wipe away with a microfiber towel.

Okay Bruce, but How do you know DIY Spray Detailer works?

My first test was on my own prized 2008 Cadillac STS-V of course.  In the photo above you can see the ‘after’ shot.  The back of the Cadillac gets a light film of dirt due to the aero parts working — the back catches dirt that can’t come off the spoiler with the air and stays there.

As soon as I sprayed on the DIY Spray Detailer I could see dirt lift and stream down the paint in tiny brown rivulets.  One quick wipe with a handy microfiber towel, which along with the soap lubrication in the DIY Spray Detailer lifts dirt away from the paint, and the back of my Cadillac was shiney and clean.

I also did a quick-round of wheel cleaning, using the tight spray control to just hit the wheels and a microfiber towel to clean them off.  This worked great for cleaning the wheels, but basically blackened the microfiber towel.  I started with a used / almost done towel.  In the future I might use the DIY Spray Detailer and a wheel brush instead of a microfiber towel on tires/wheels.

Summary

if you are heading to a car show, consider an off-the-shelf spray detailer solution designed for this purpose.  If you are just trying to keep your Cadillac clean and looking good, consider mixing up some DIY Spray Detailer when needed.

I am pleased with my result and plan to continue to use my DIY Spray Detailer for spot clean-up.