Cooler on deck: Cadillac STS-V intercooler heat exchanger Stage 1 Step 2

I received the Flexalite 45321 heat exchanger today:

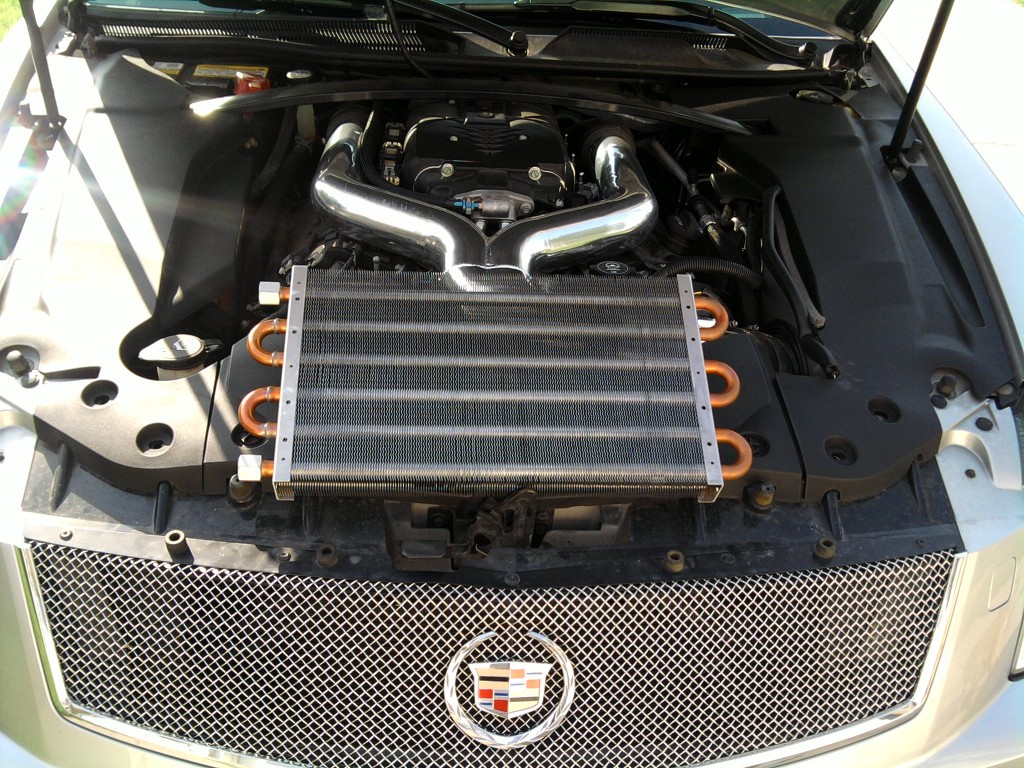
Comparison size of the new heat exchanger in relation to the STS-V

It is not installed yet, but I set it on the front of the engine covers so one can see the size for perspective.

The Flexalite came with some mounting trim but I will need to go to Lowe’s or Home Depot to get an NPT connector to hose fitting.  I am thinking get a 90 degree 1/2″ NPT elbow then an NPT to hose connector after I get the connectors pointed backwards.

I am still conflicted on how to install this.  Choices are either install the new HX in place of the existing OEM radiator single pass HX or install the new HX in addition to the existing OEM radiator single pass HX.  The advantage of the first choice is then I am set to add another heat exchanger under the bumper later if needed.  The advantage of the 2nd choice is that we get the benefit of both exchangers in series, albeit at the cost of more resistance to flow.

The people using a variant of this HX are either using it alone, or with another front mounted heat exchanger in series.  No one is using it in series with the OEM HX.


Intercooler Cooling – gathering parts

I ordered a Flex-a-lite 45321 heat exchanger to help with intercooler cooling on my 2008 Cadillac STS-V

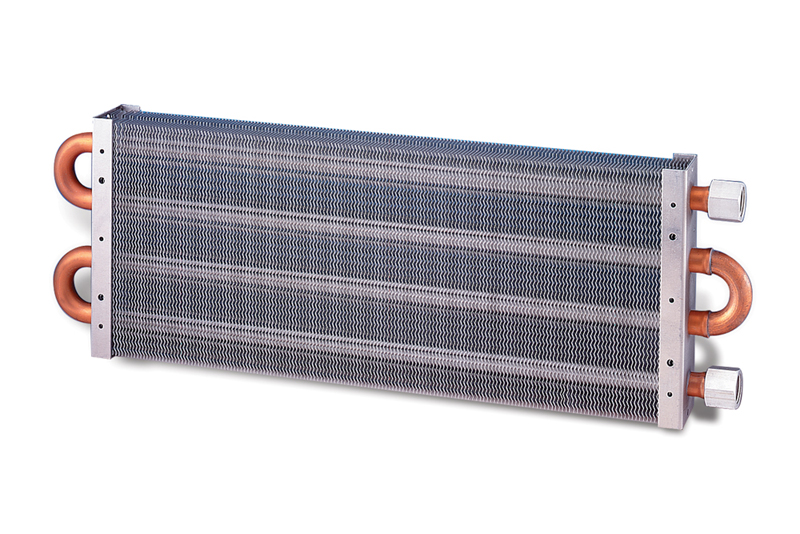
Flex-a-lite heat exchanger

This is the heat exchanger that one Tuner uses alone in place of the factory intercooler heat exchanger on the STS-V  — except that they use one with a 10″ puller fan on it.  On the dyno and on the street we have plenty of air flow so I am going without the fan.

The OEM heat exchanger is  a small radiator, 24x14x.5 that is single pass with many water routes.  The Flex-a-lite has a single tube with 6 passes (the picture shown is a 4 pass version but the one ordered, 45321,  is 6) and is 10 1/2″x21″x1 1/2″

I am thinking though the best ways to test this versus the OEM config.  I am tempted to put this cooler in series with the OEM cooler, although no one is doing that so far.

What some V owners have done is replace the OEM heat exchanger with this unit, then place a Frozen Boost 101 heat exchanger in front below the front bumper, and use both heat exchangers in serial.  Other installs have just replaced the factory heat exchanger, then added a tank for extra coolant capacity.

I like the coolant tank from the LS9 install, and it would be ‘factory’, but not sure that I want to do there yet.

What do you think?   How would you setup the intercooler cooling on my V?

Commanding the Intercooler pump key on engine off

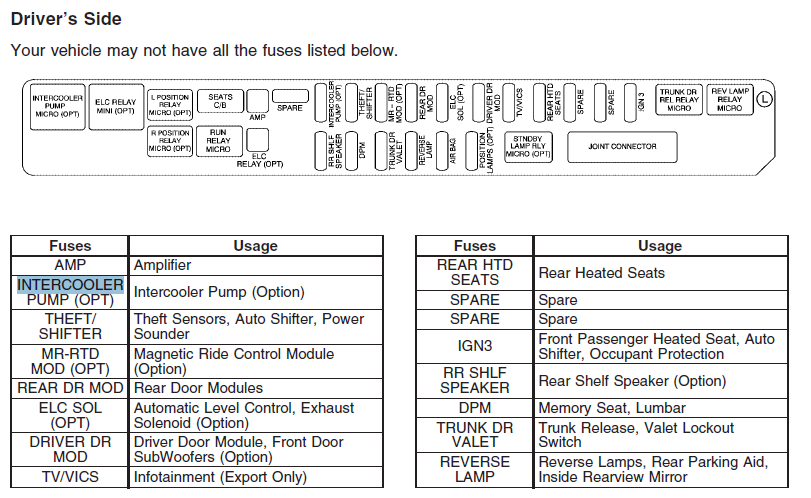
The intercooler pump relay on the Cadillac STS-V is on the driver’s side fuse box.   It would be useful to be able to command the intercooler pump on when the key is on but the engine is off (KOEO) — example on the dyno under a fan — to cool the intercooler and intake manifold off.

Now, the Driver’s side fuse box they mention is under the rear seat on the Driver’s side.

On some vehicles the owners simply short across the relay when desired and manage to turn the pump on.

Hmm…

On some vehicles HPTuners VCM Scanner can also do this sort of thing under VCM Controls.  Mine appears to give that option, and will let me press the ‘On’ button, and it goes green, but the pump does not appear to come on.

I have also tried setting the intercooler pump delay after engine turn on from 10 sec to 0 sec but that didn’t appear to do it either.

If you have some experience with turning on the intercooler pump with the Accessories on, engine off on the STS-V or similar, please comment and point out what I’m not doing.